1
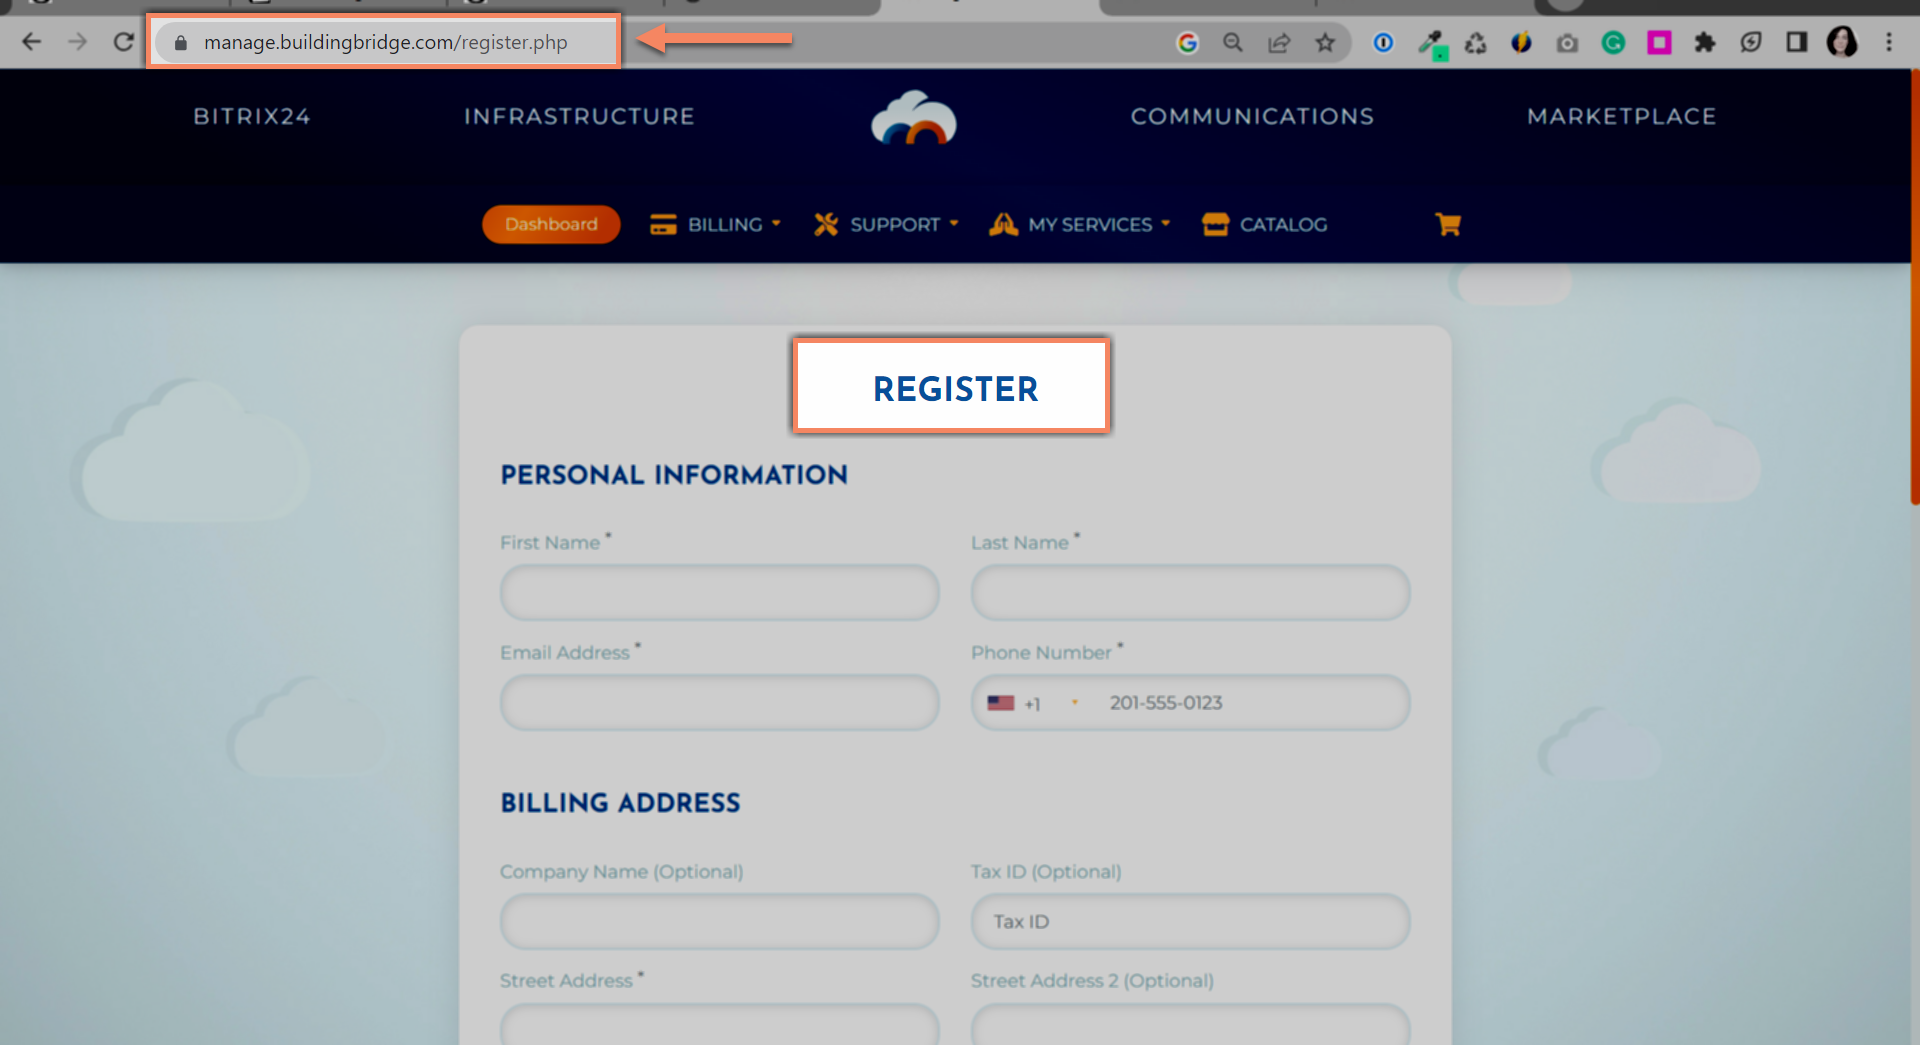
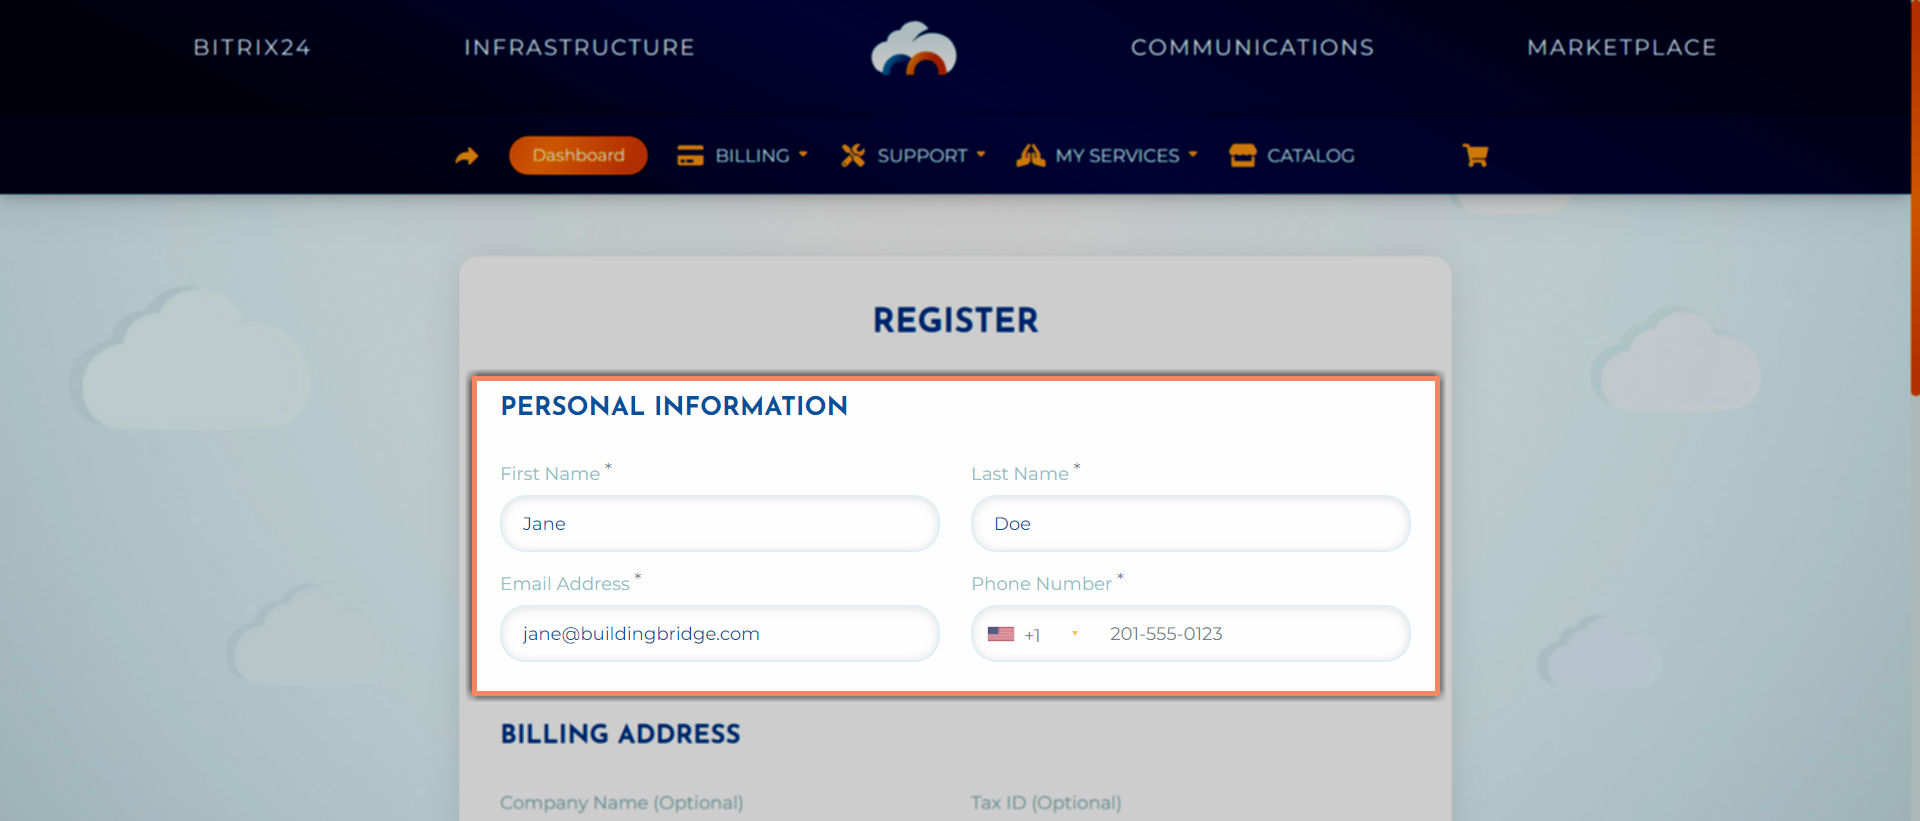
Registration page
Click here or paste "https://manage.buildingbridge.com/register.php" into your browser.
How to create, recover, and manage your building bridge account.
Account owners have all permissions to access and update areas like billing information, user management and more...
Forgot your password? Recovering your account is easy...
Click here to visit our password reset page.
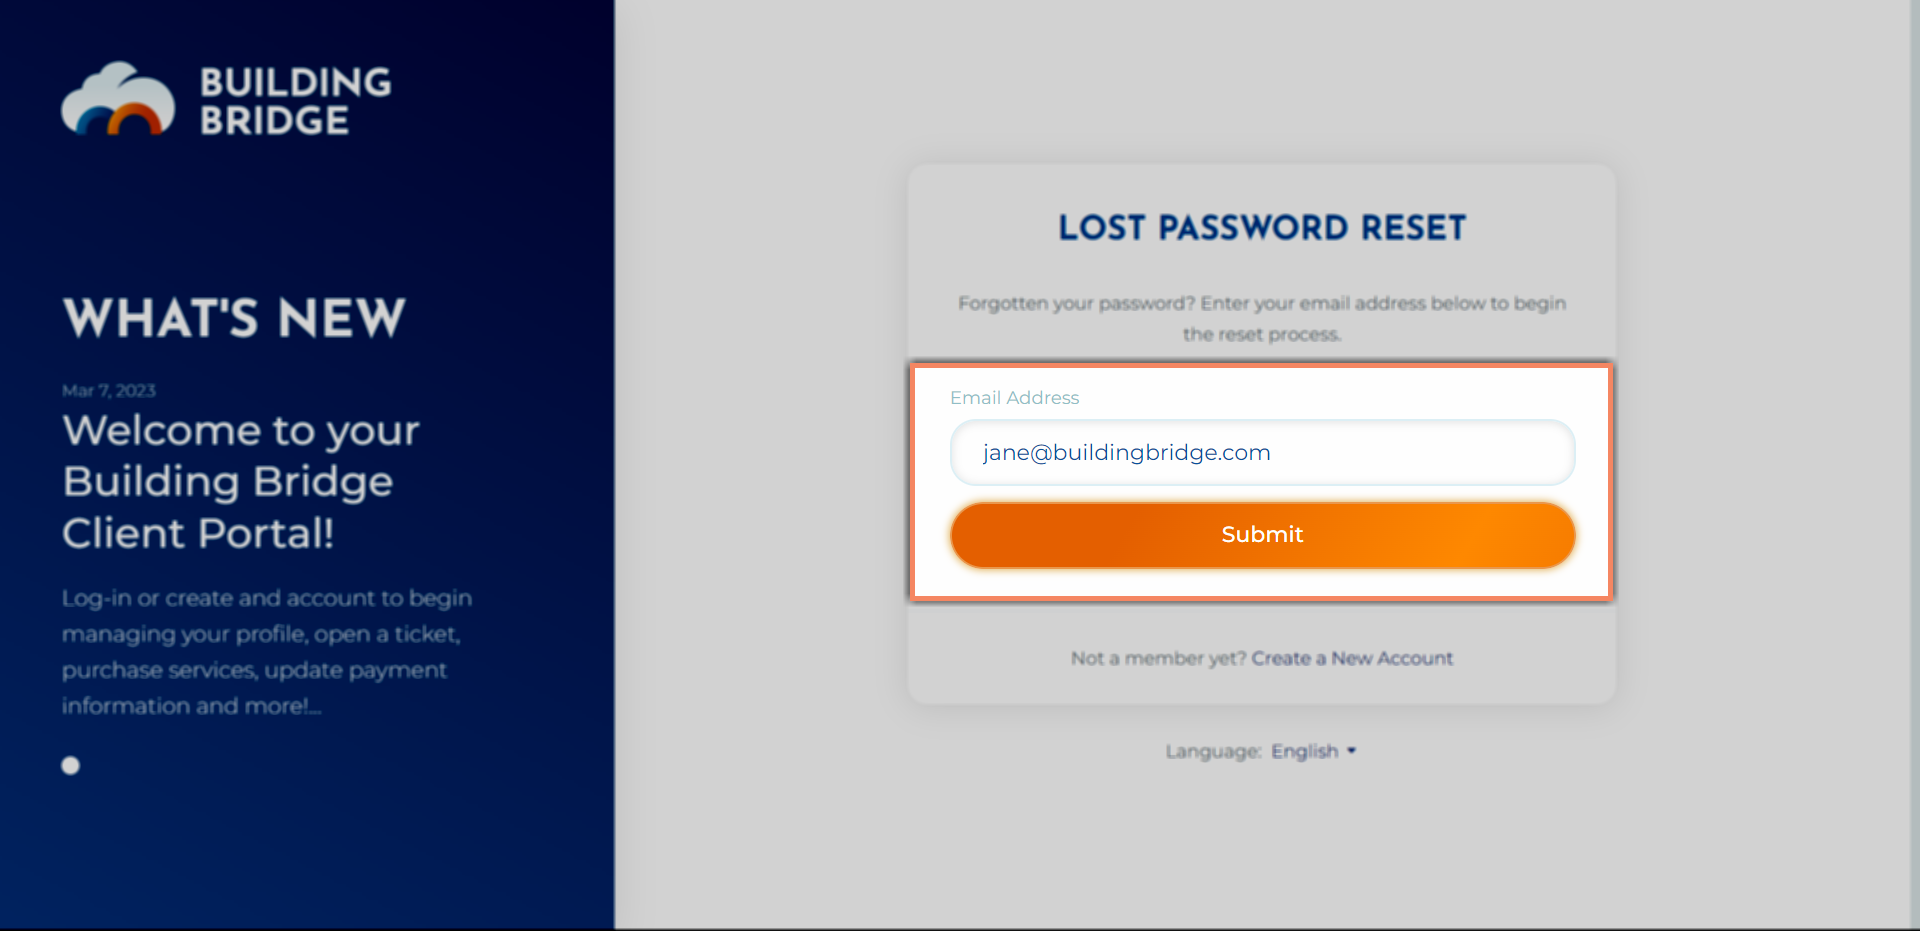
If you are on the client portal sign-in Page, click "Forgot?".

Enter the email address associated with your account.
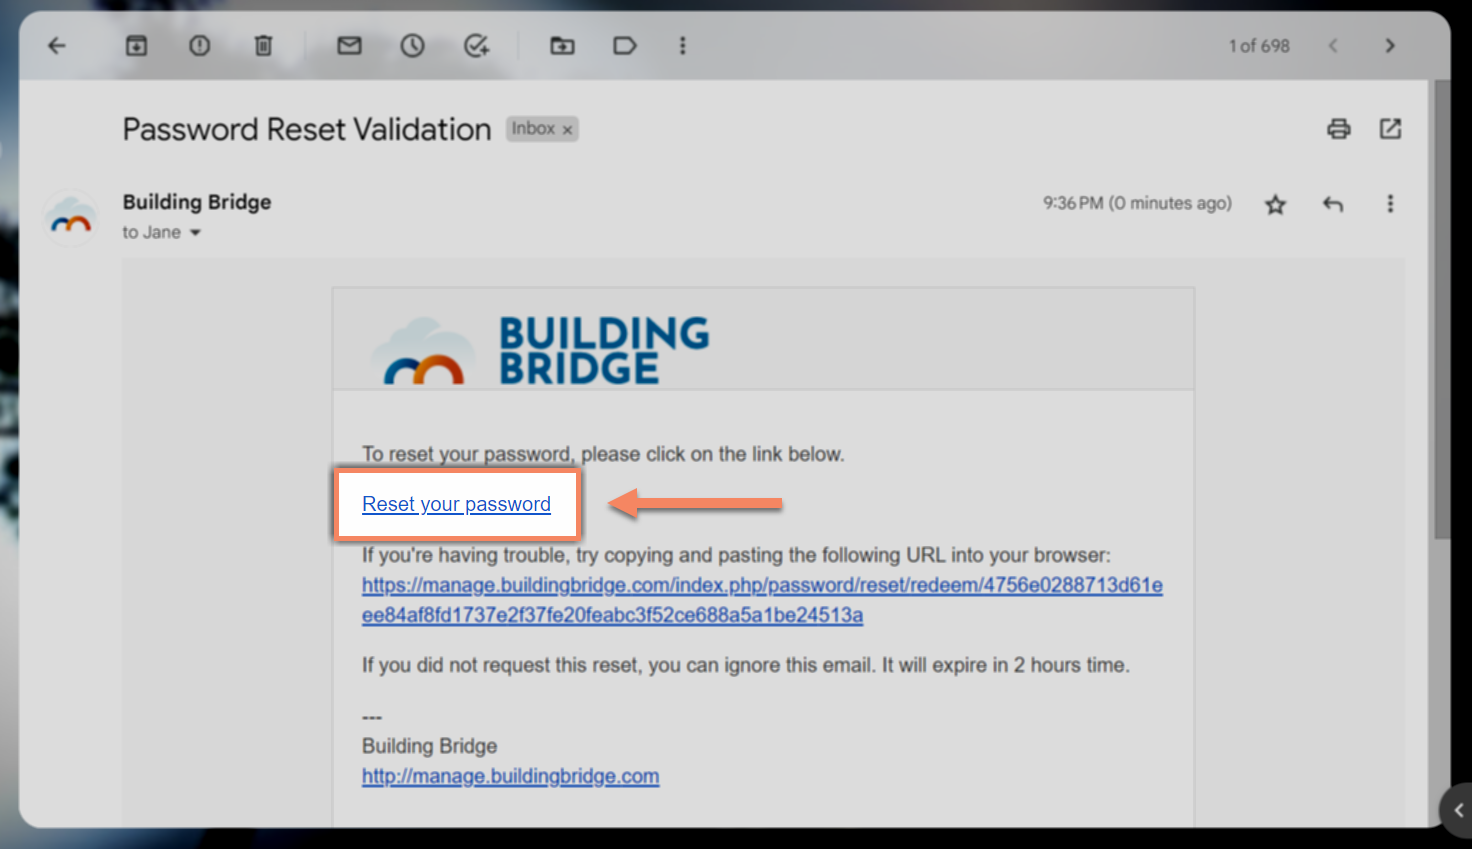
You will receive a "Password Reset Validation" email from "support@buildingbridge.com" (check your spam folder if one does not arrive within a few minutes. Click "Reset your password".
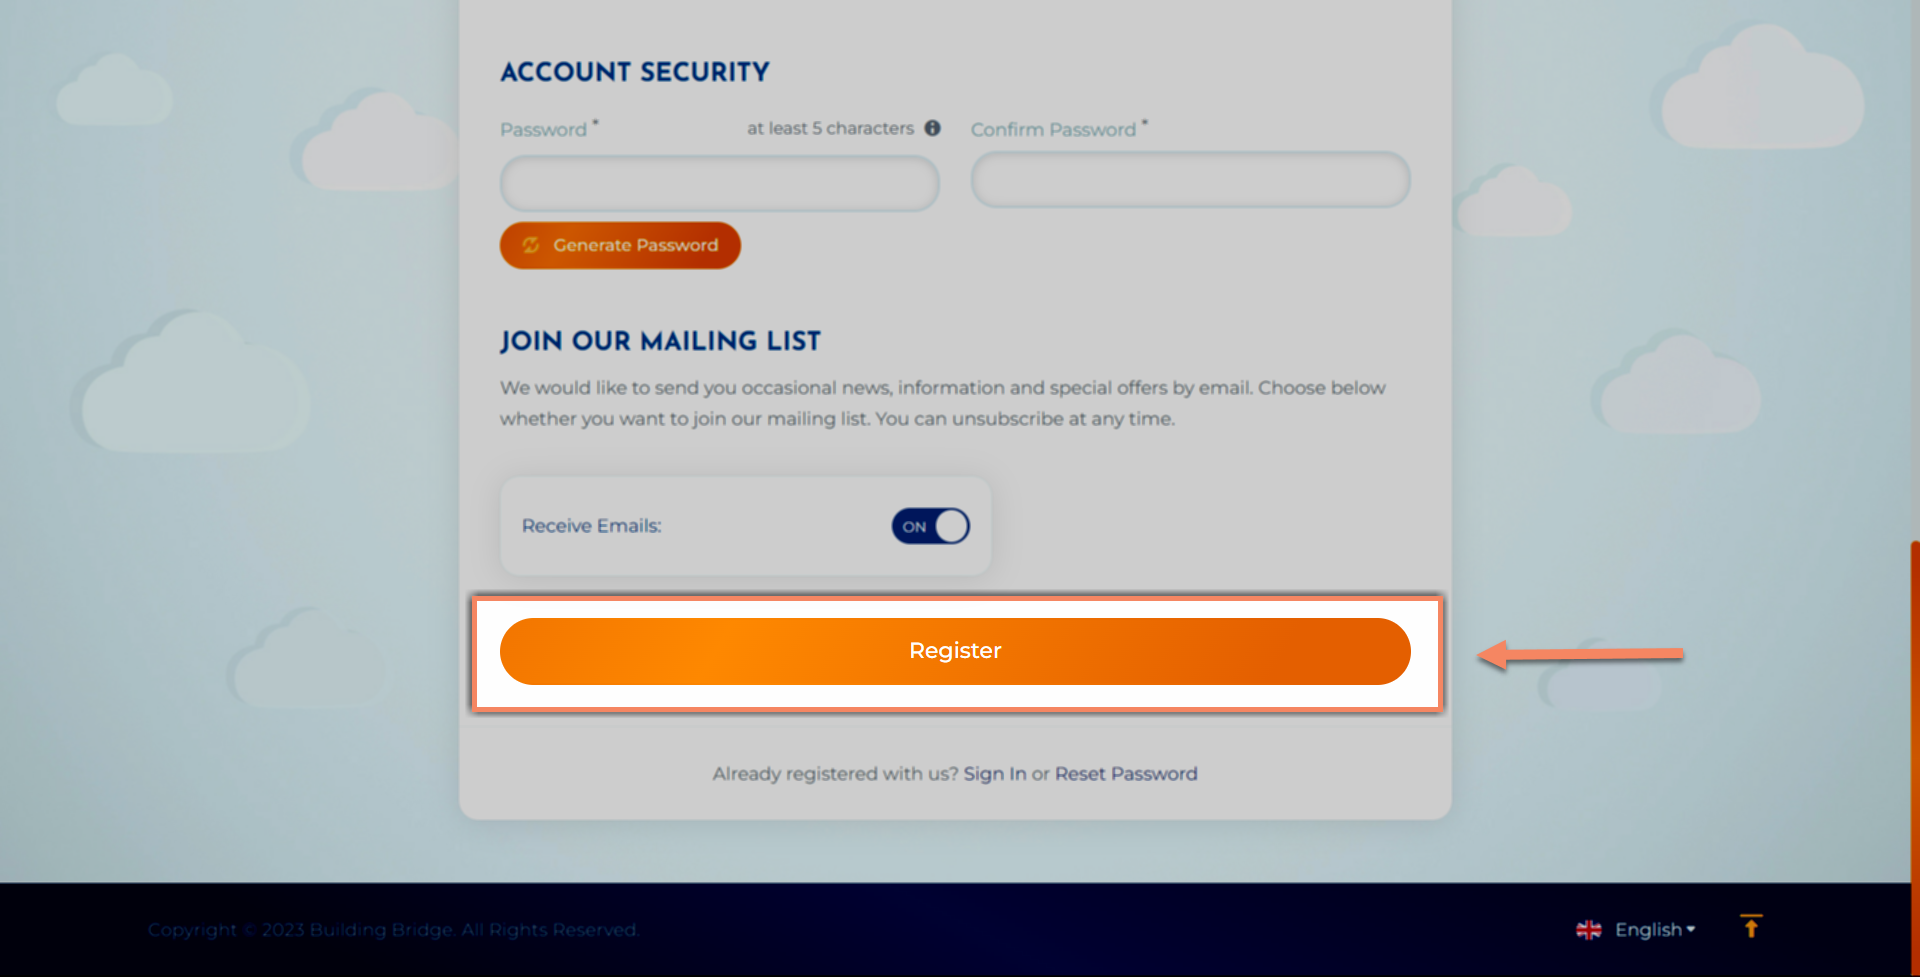
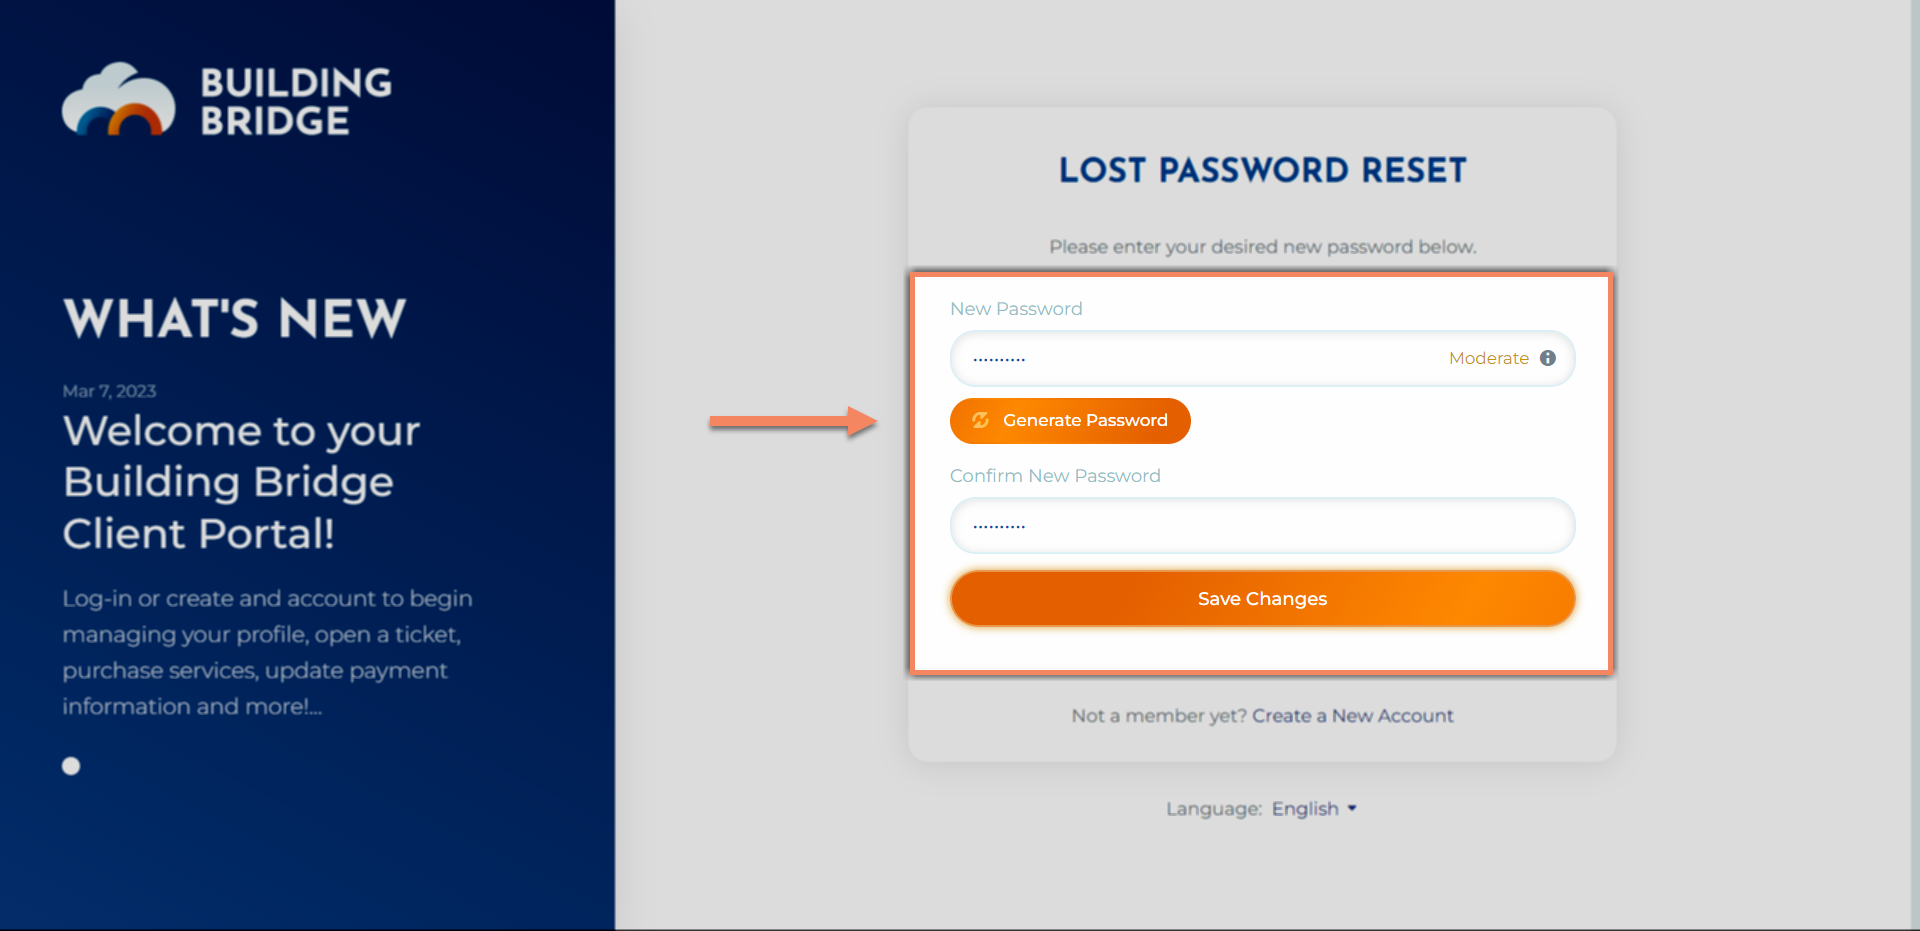
Enter and confirm a unique password and click "Save Changes".
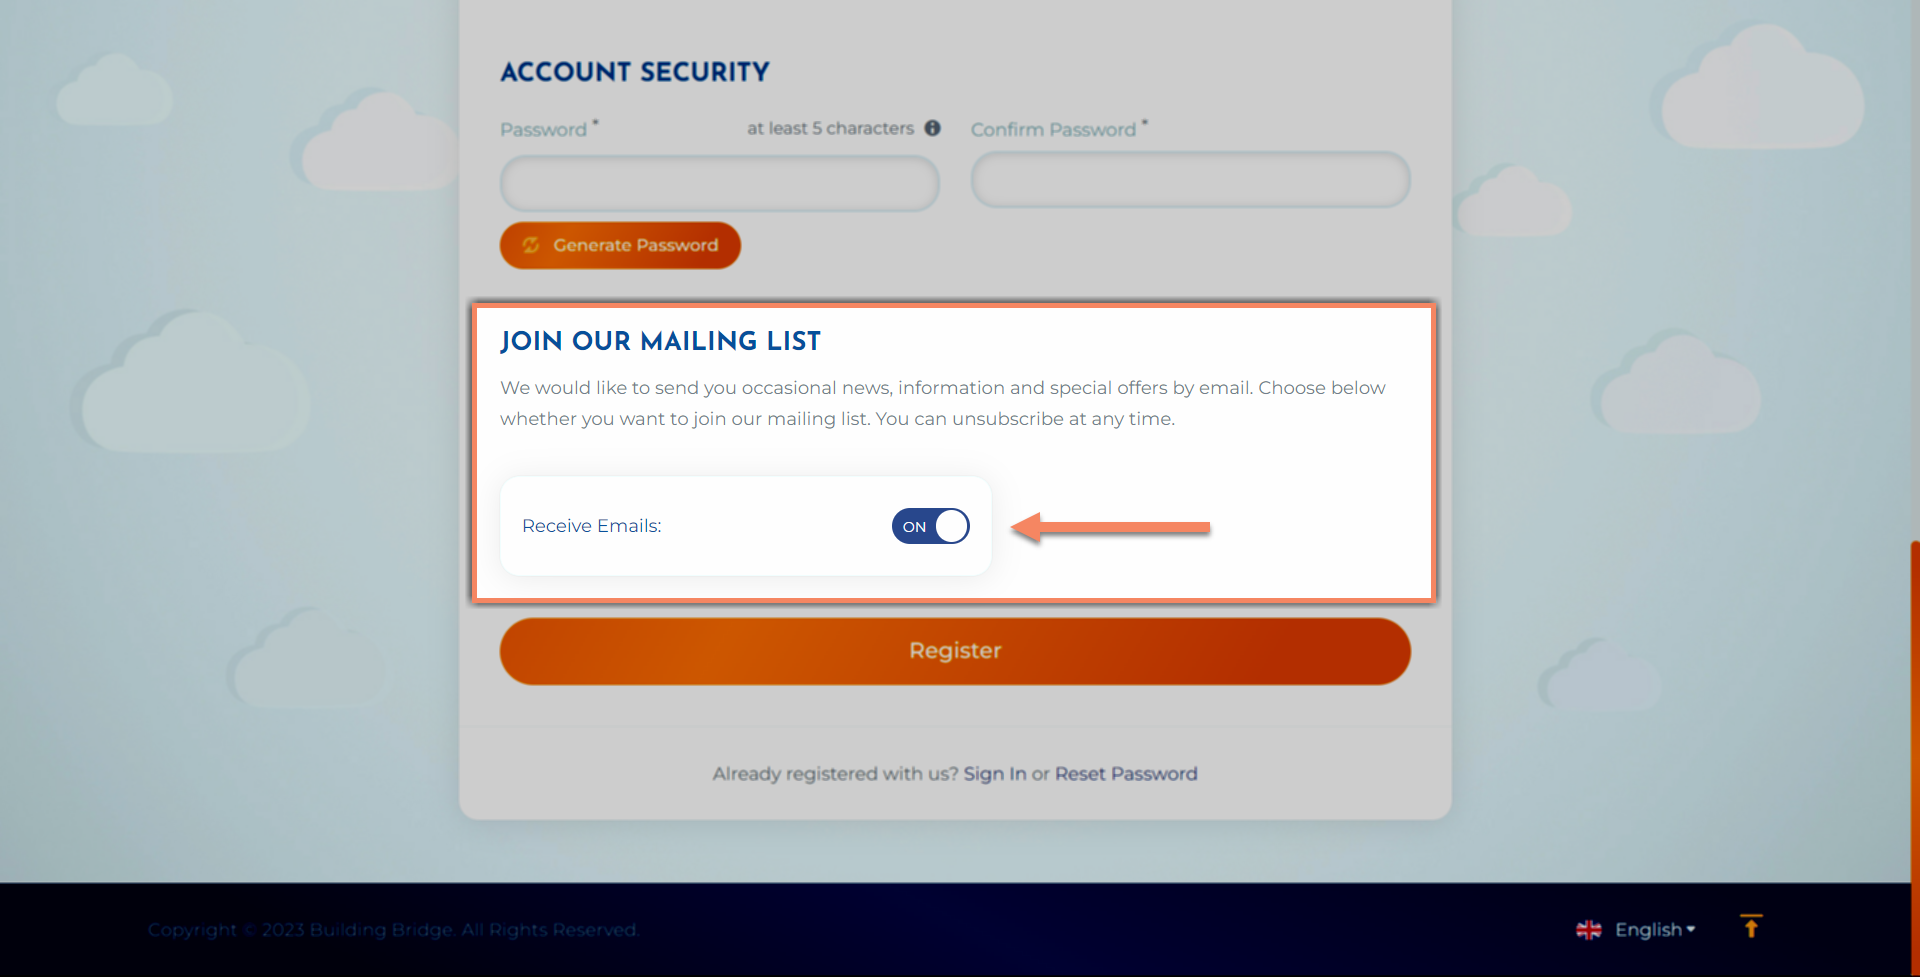
If you use a password vault, we recommend using our "Generate Password" tool to quickly create a secure password. Be sure to save it somewhere secure.
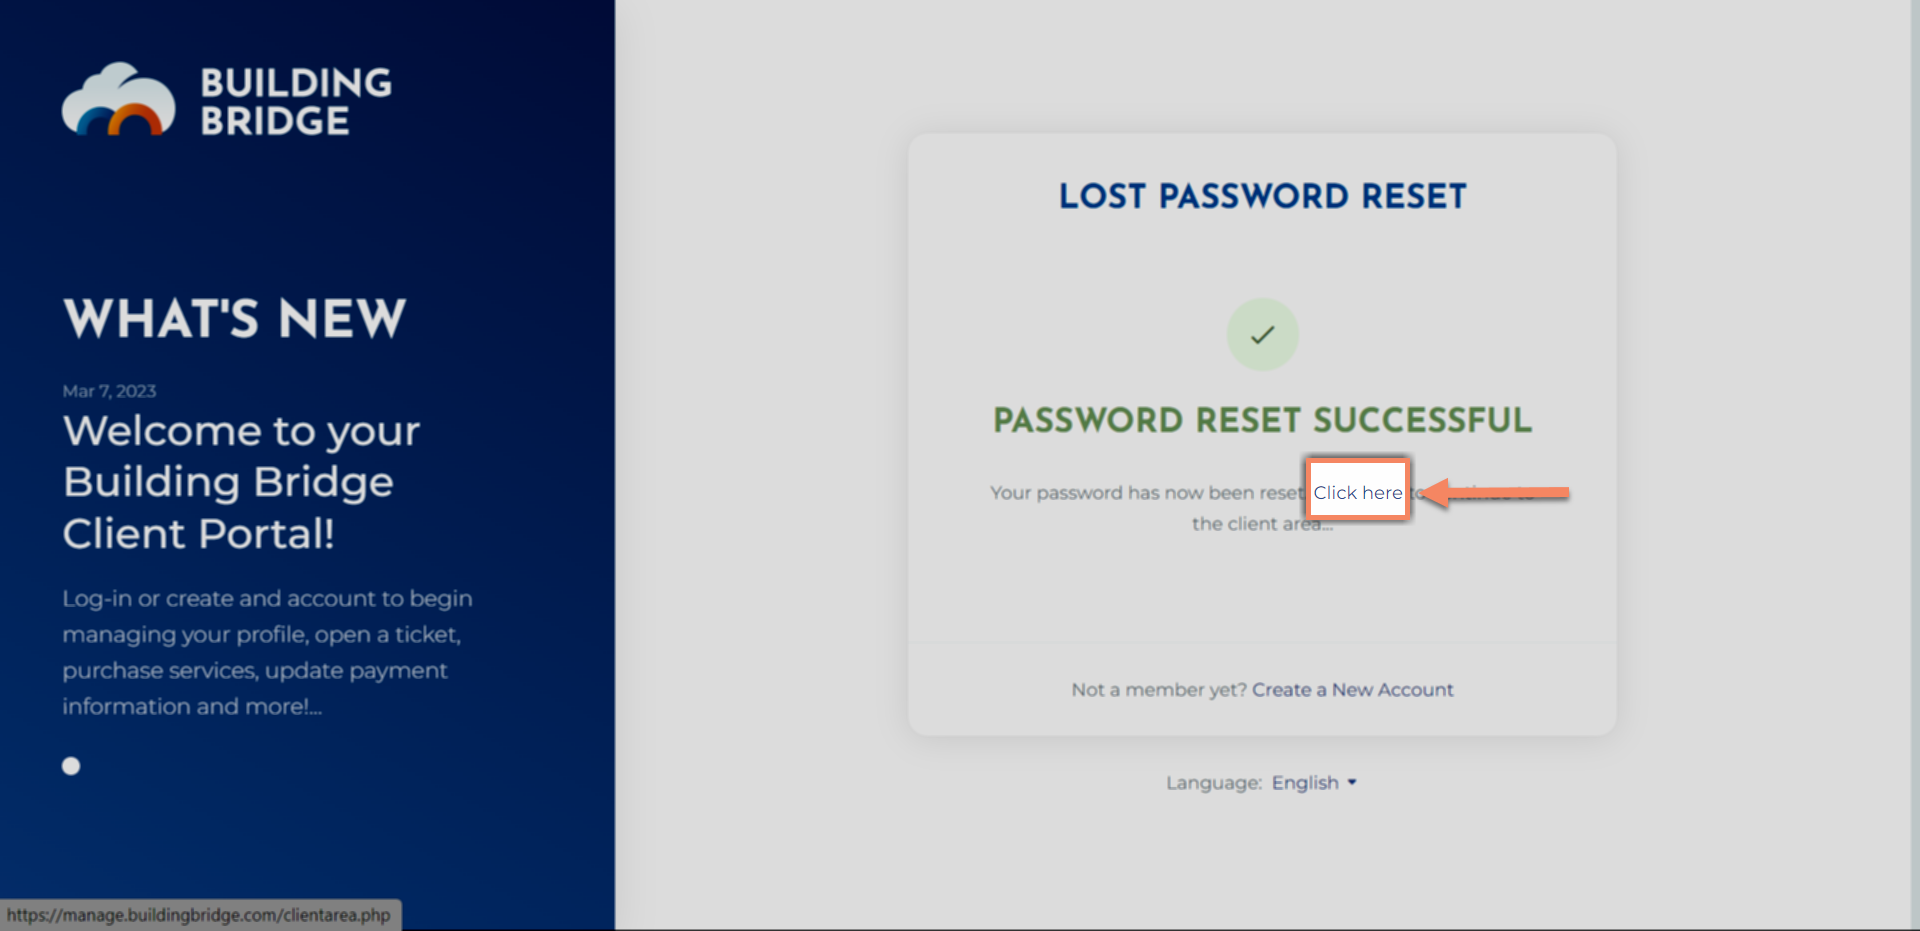
Once your password is reset you will have the option to go directly to your dashboard. Depending on your cache and security settings, you may need to enter your new password again.
Create contacts to easily communicate with vendors, clients, and other company affiliates.
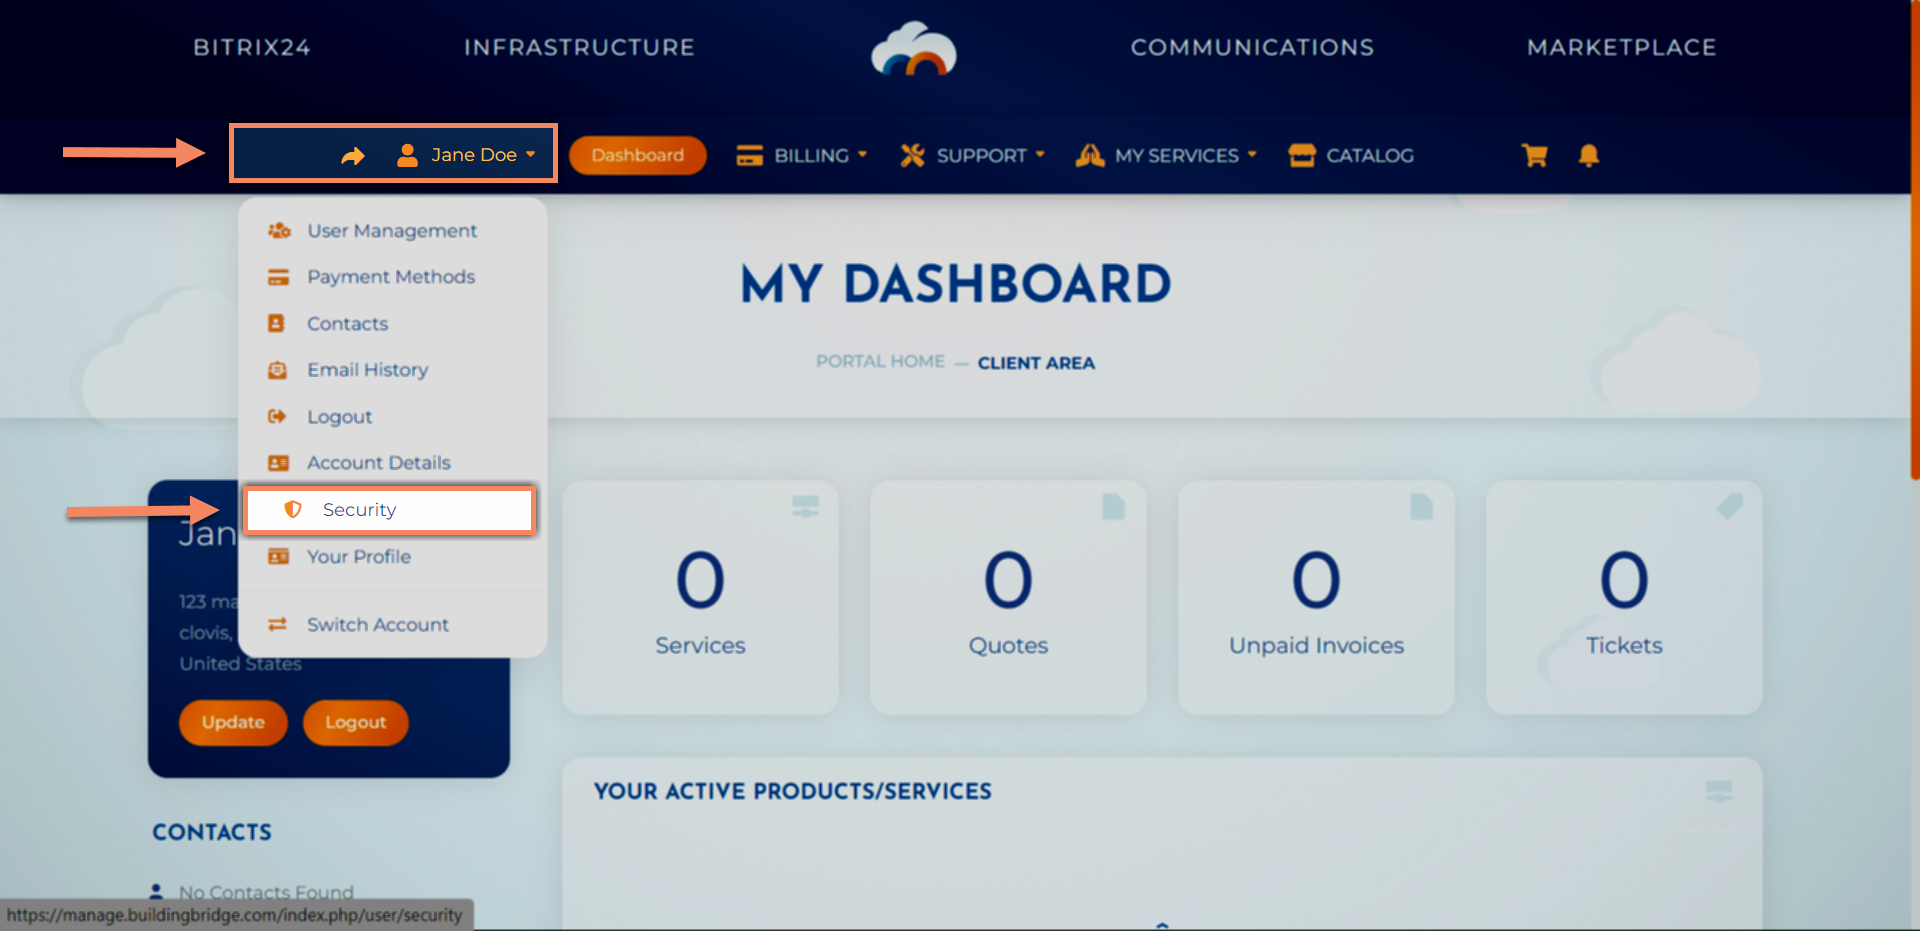
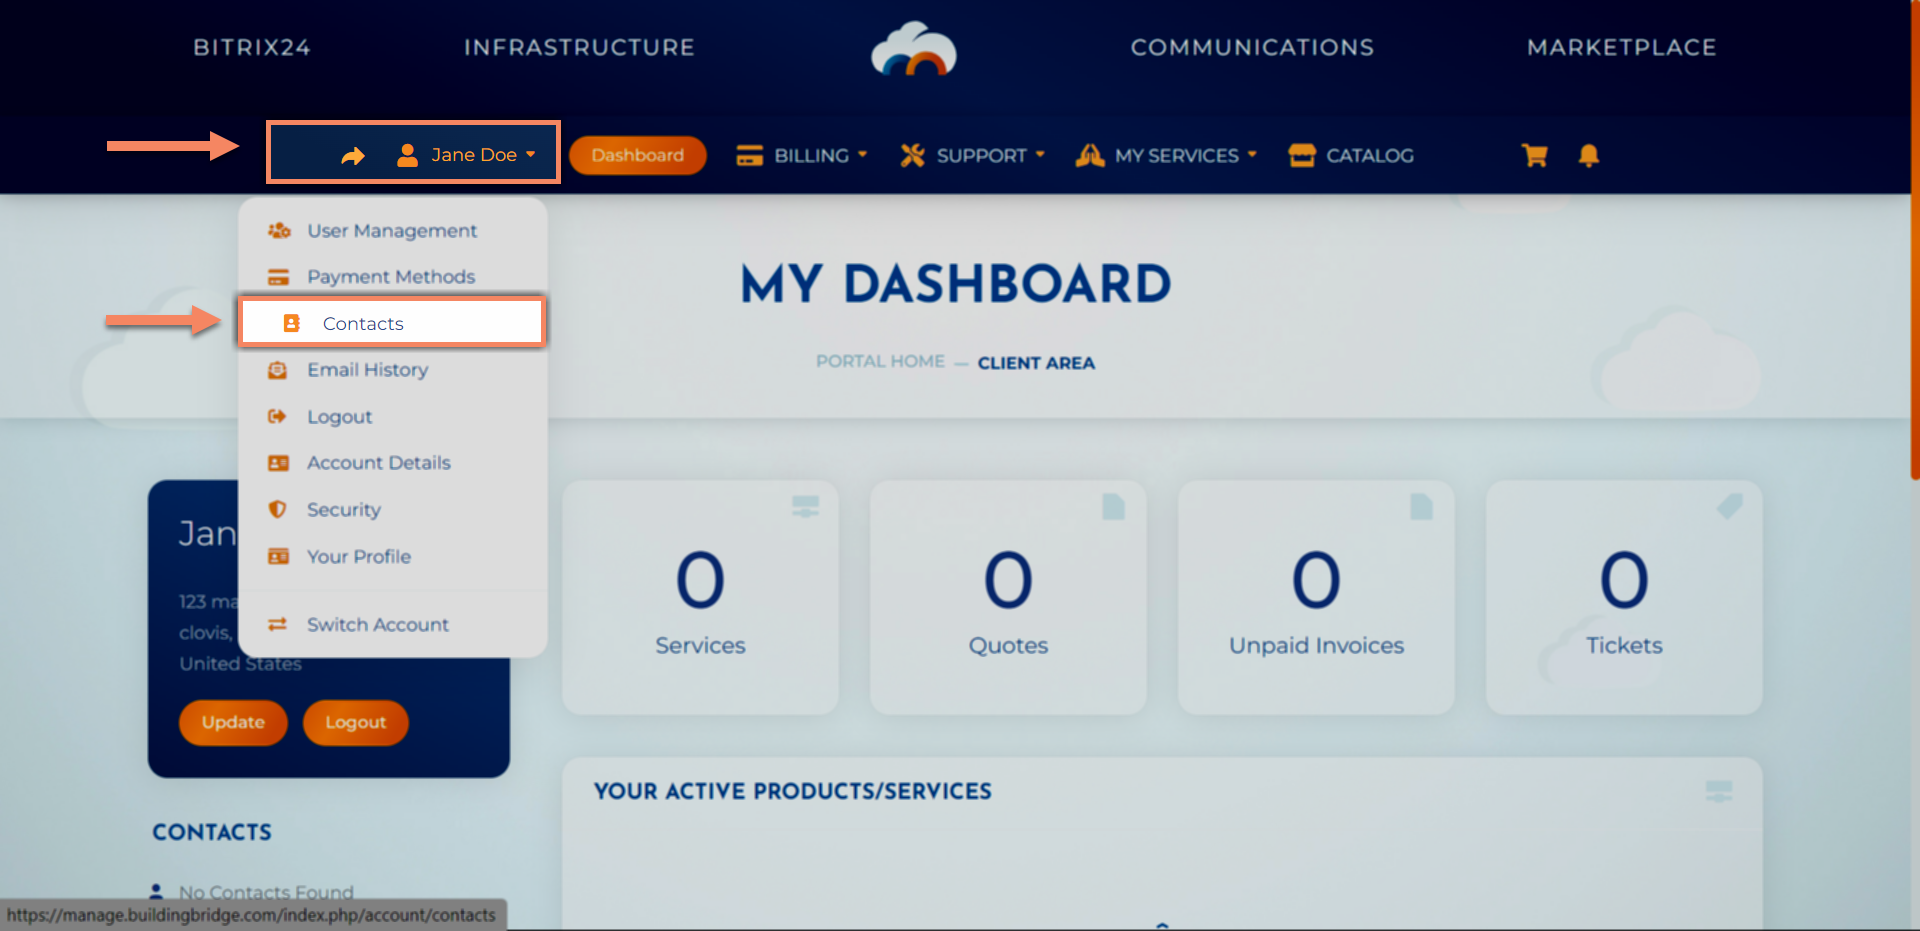
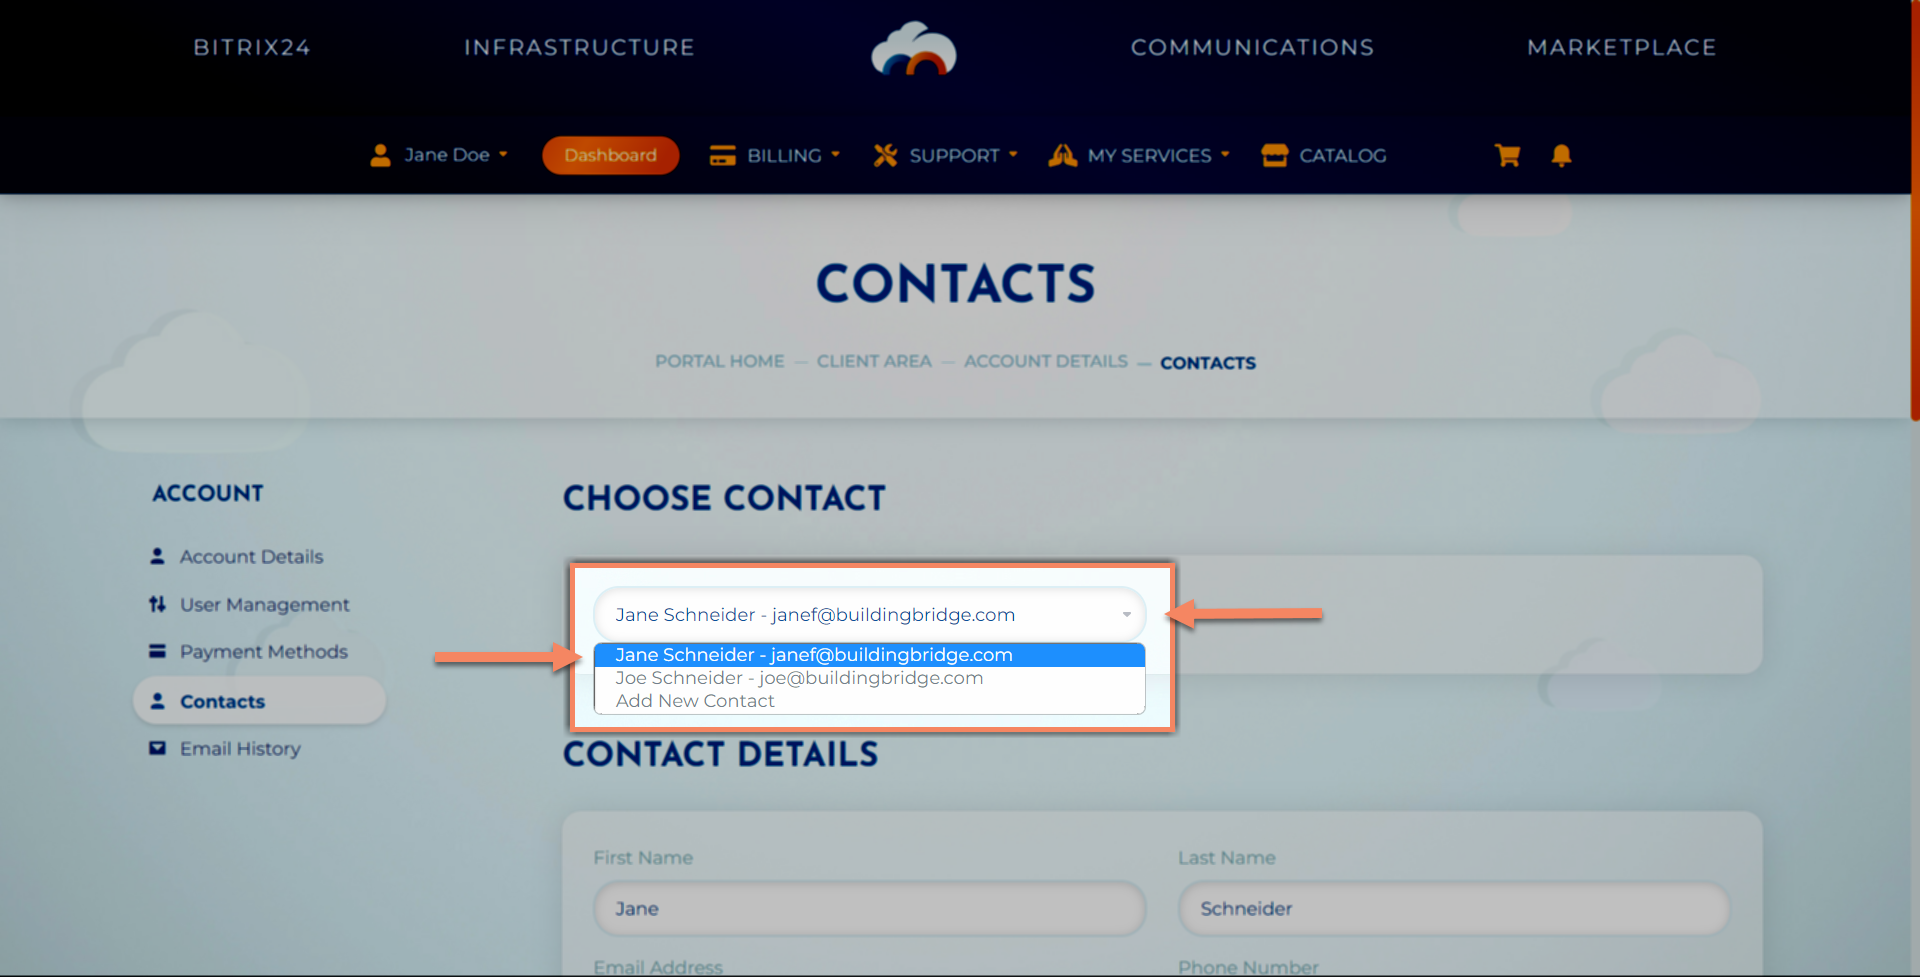
From your dashboard, click the arrow next to your name on your account tab, then click "Contacts".
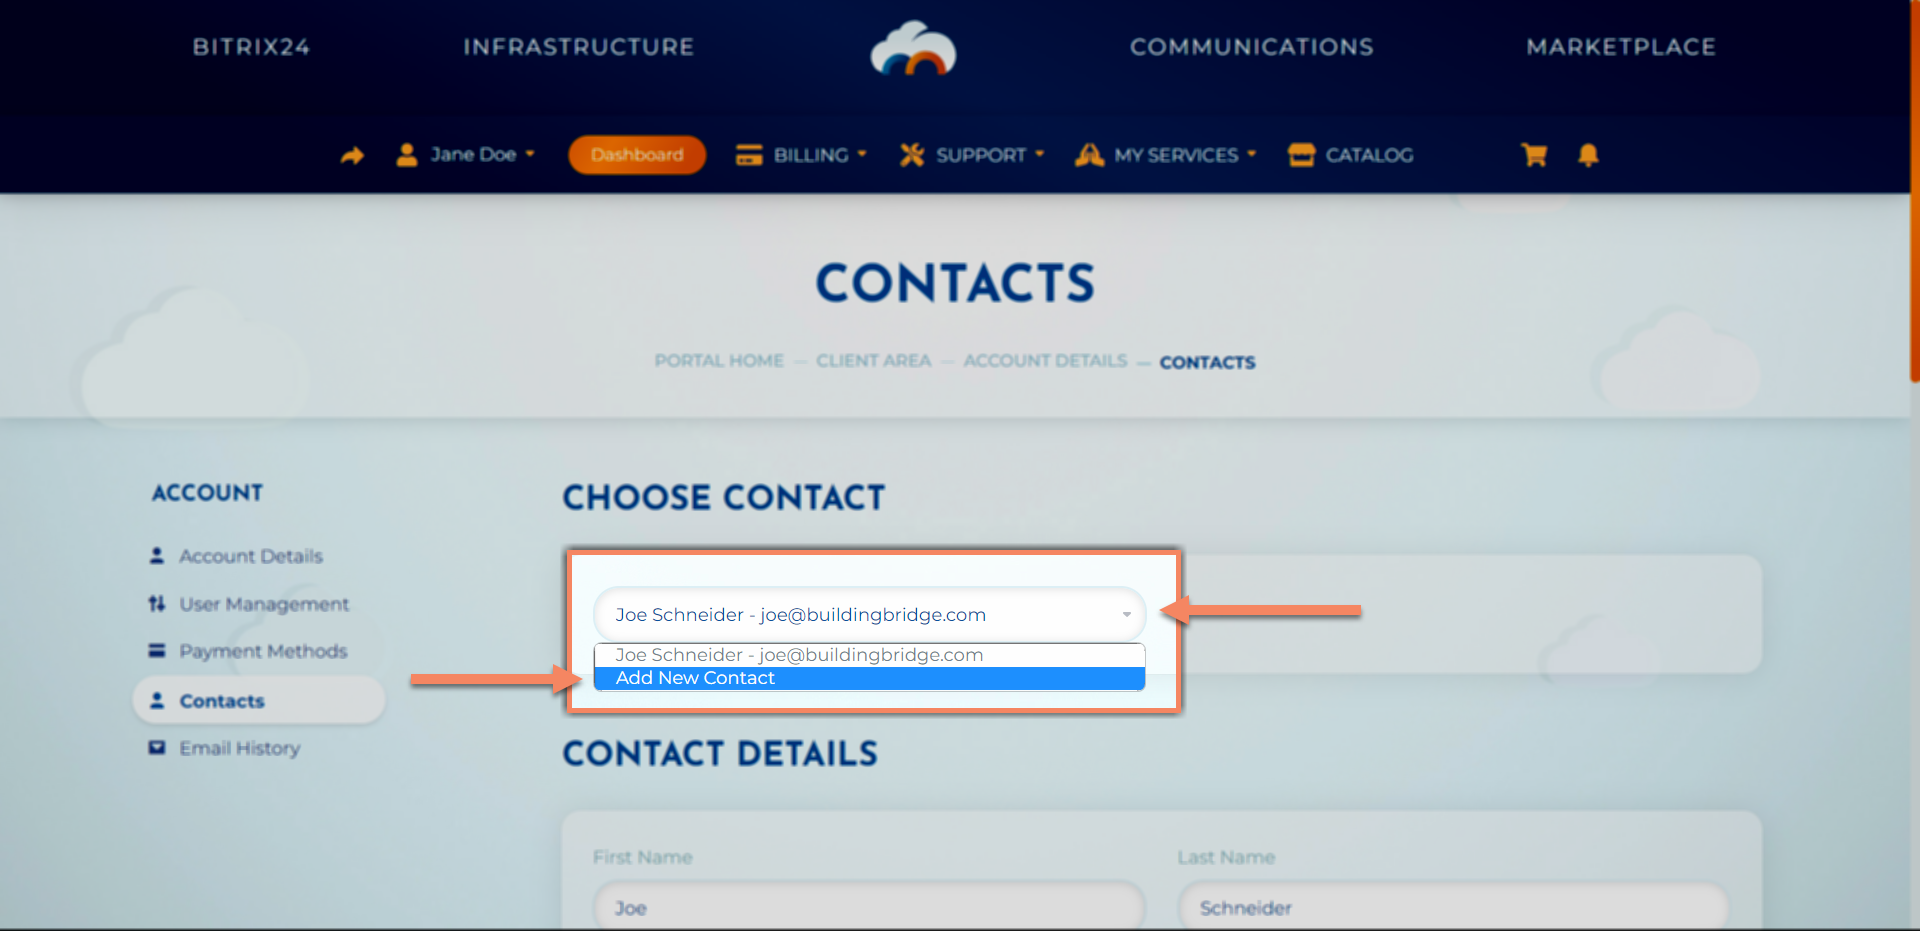
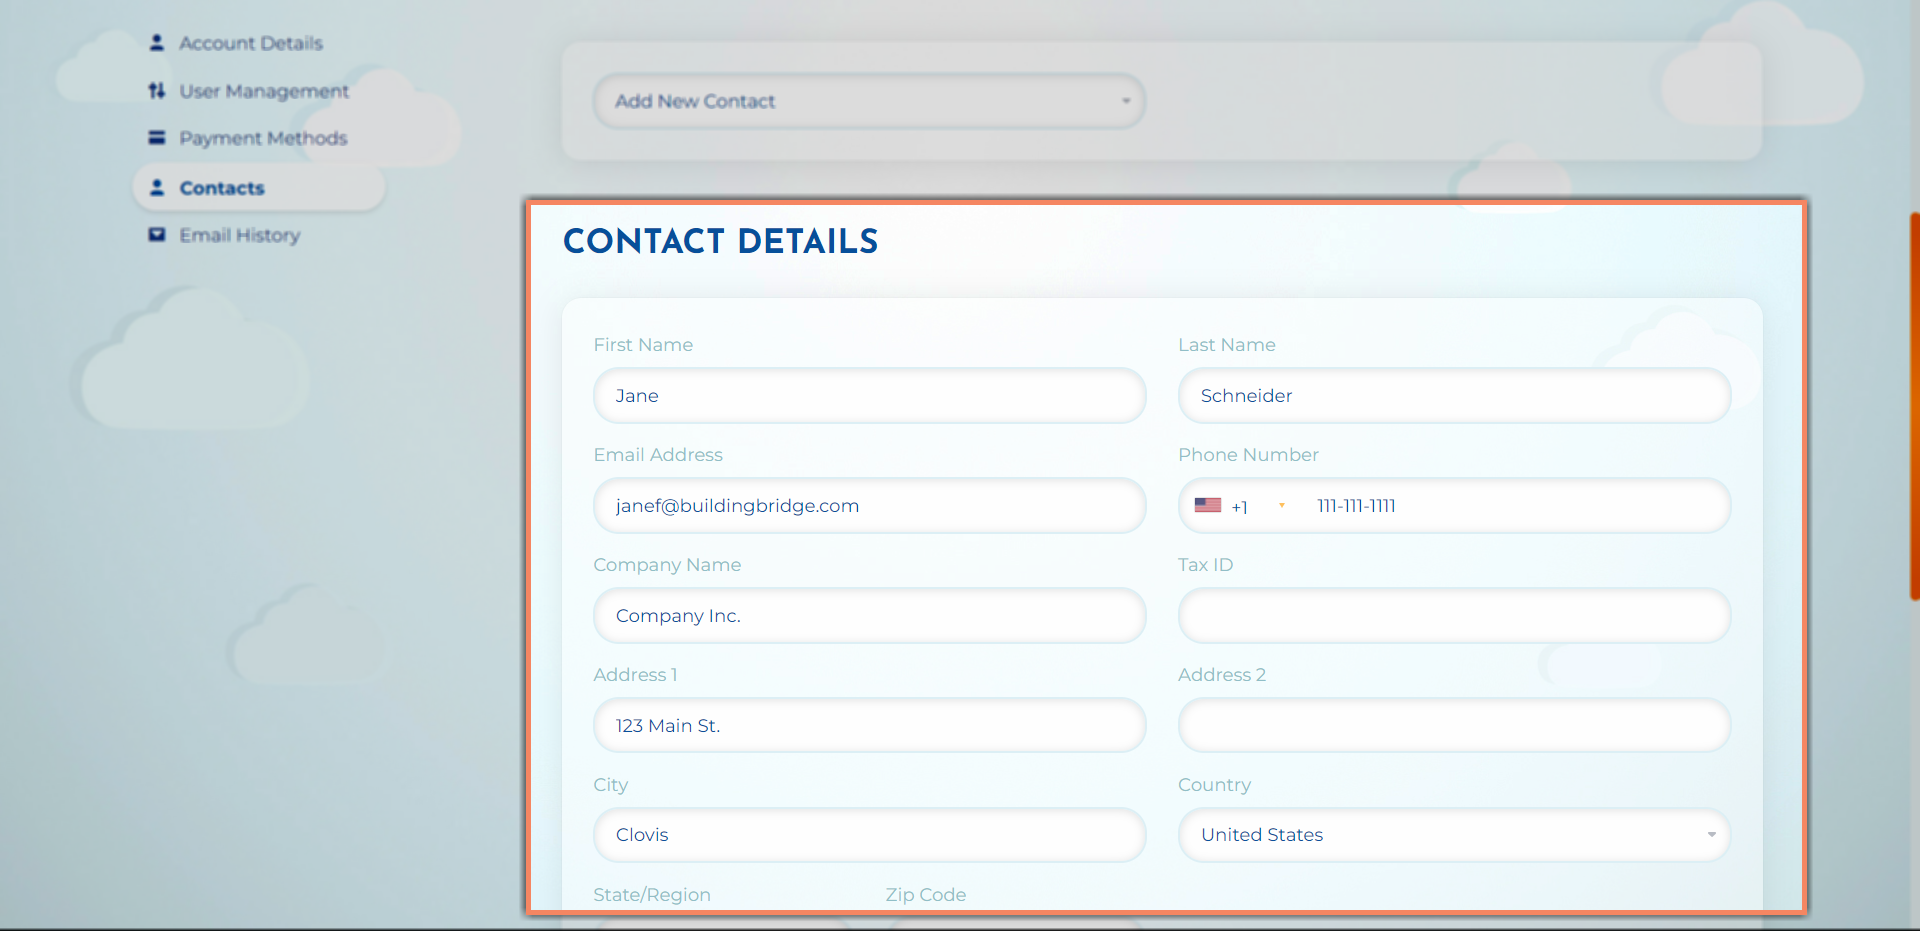
Click your "Choose Contact" dropdown and select"Add New Contact" at the bottom of the list.
Fill out all details fields for your contact.
Click the radio buttons next to each type of email you would like your contact to receive from you.
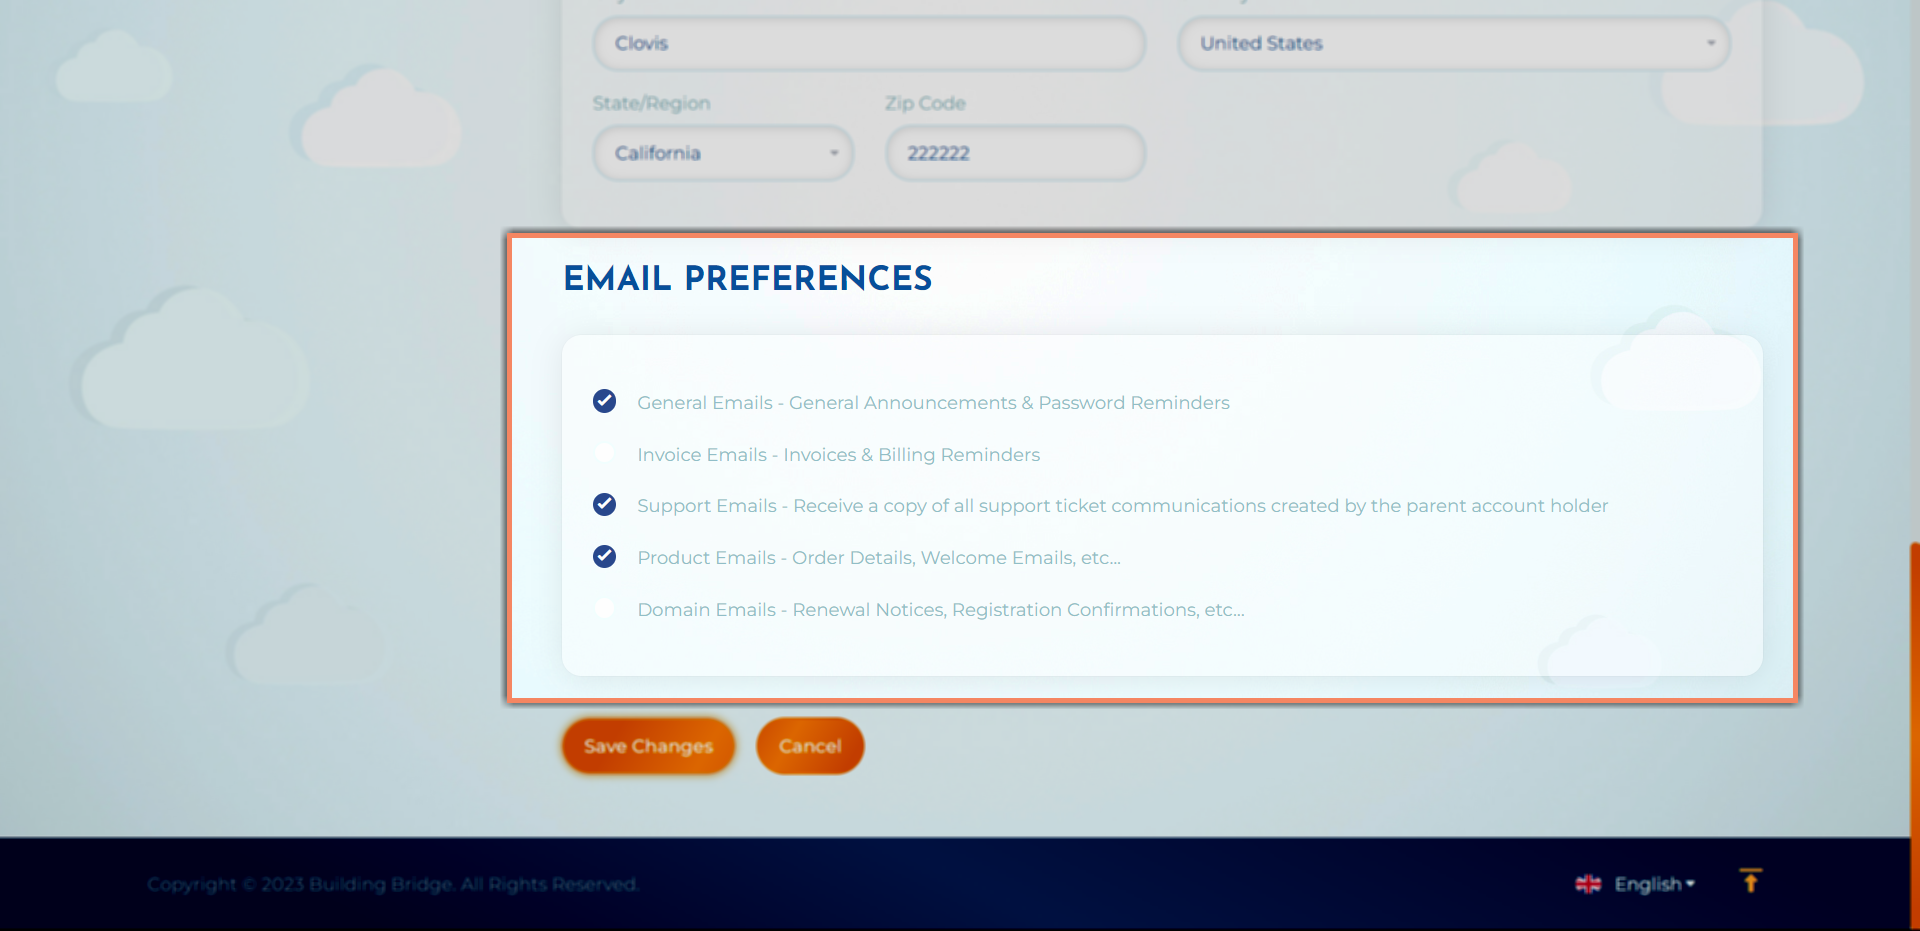
Click "Save Changes" to add your contact to your list.

Click your "Choose Contact" dropdown and select "Add New Contact" at the bottom of the list.
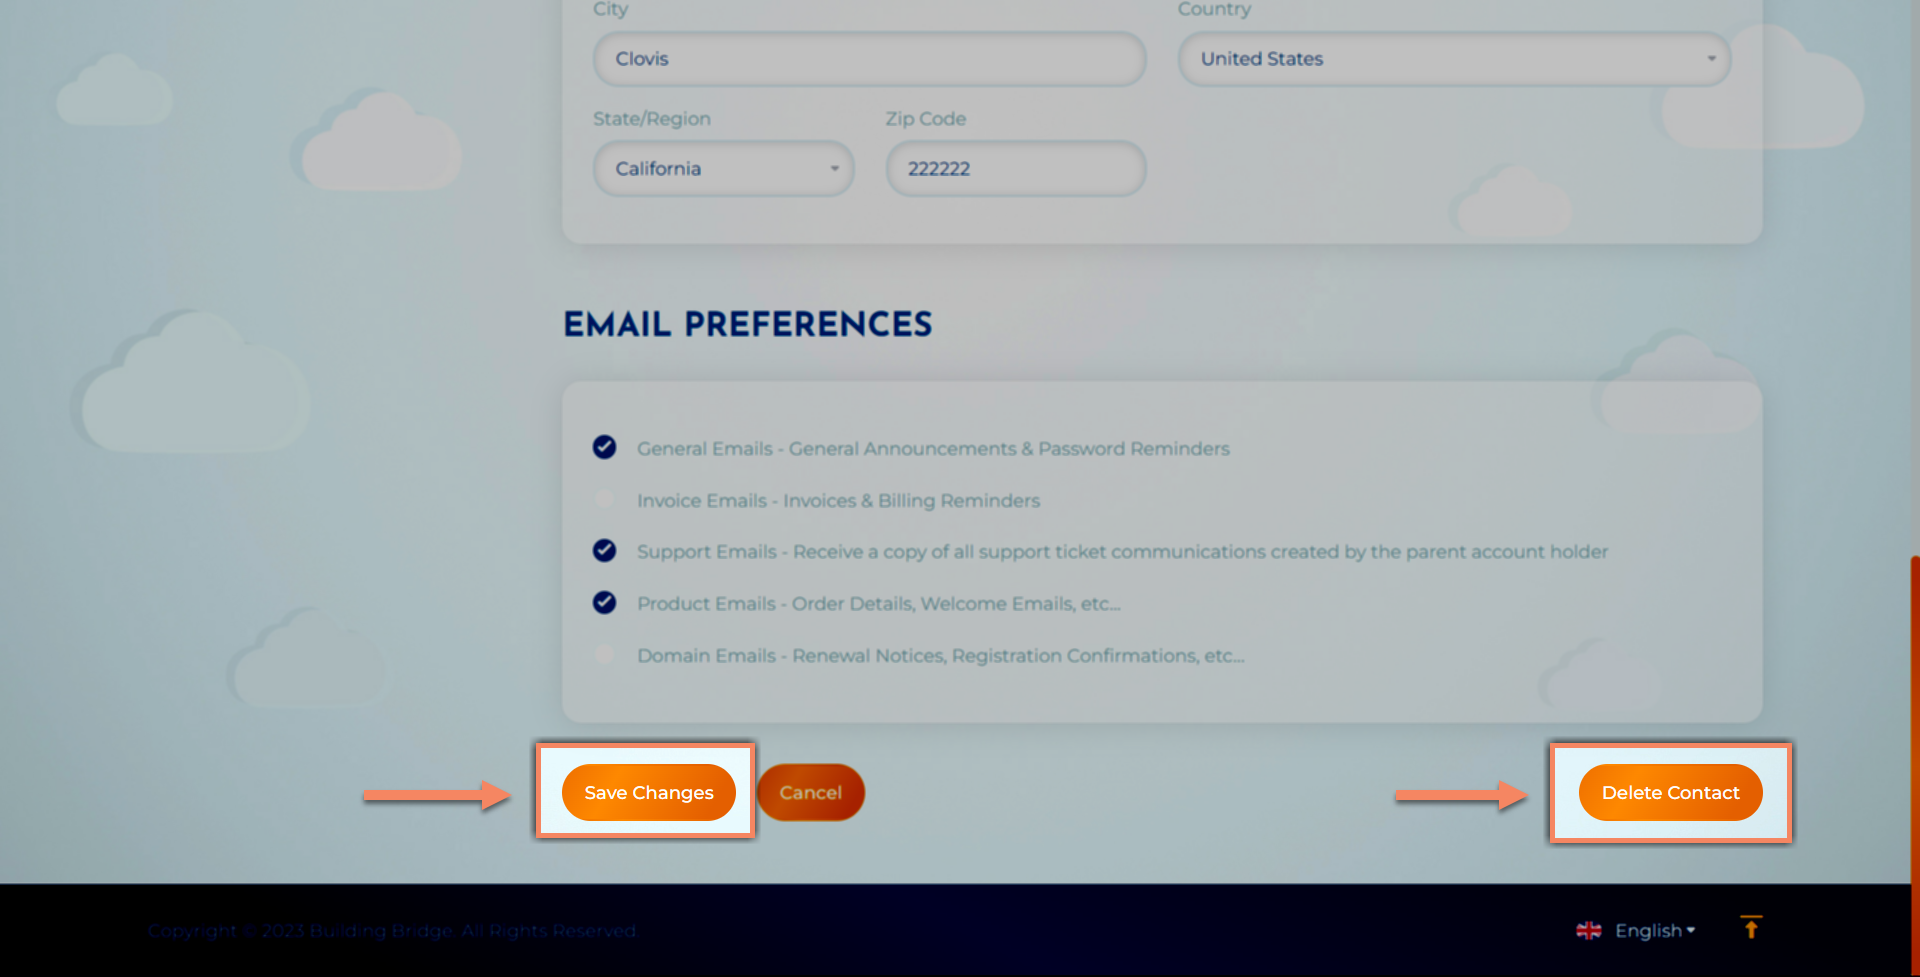
Click "Save Changes" to save your contact new information.
Click "Delete Contact" to permanently remove them from your contact list.
You will receive a "Password Reset Validation" email from "support@buildingbridge.com" (check your spam folder if one does not arrive within a few minutes. Click "Reset your password".
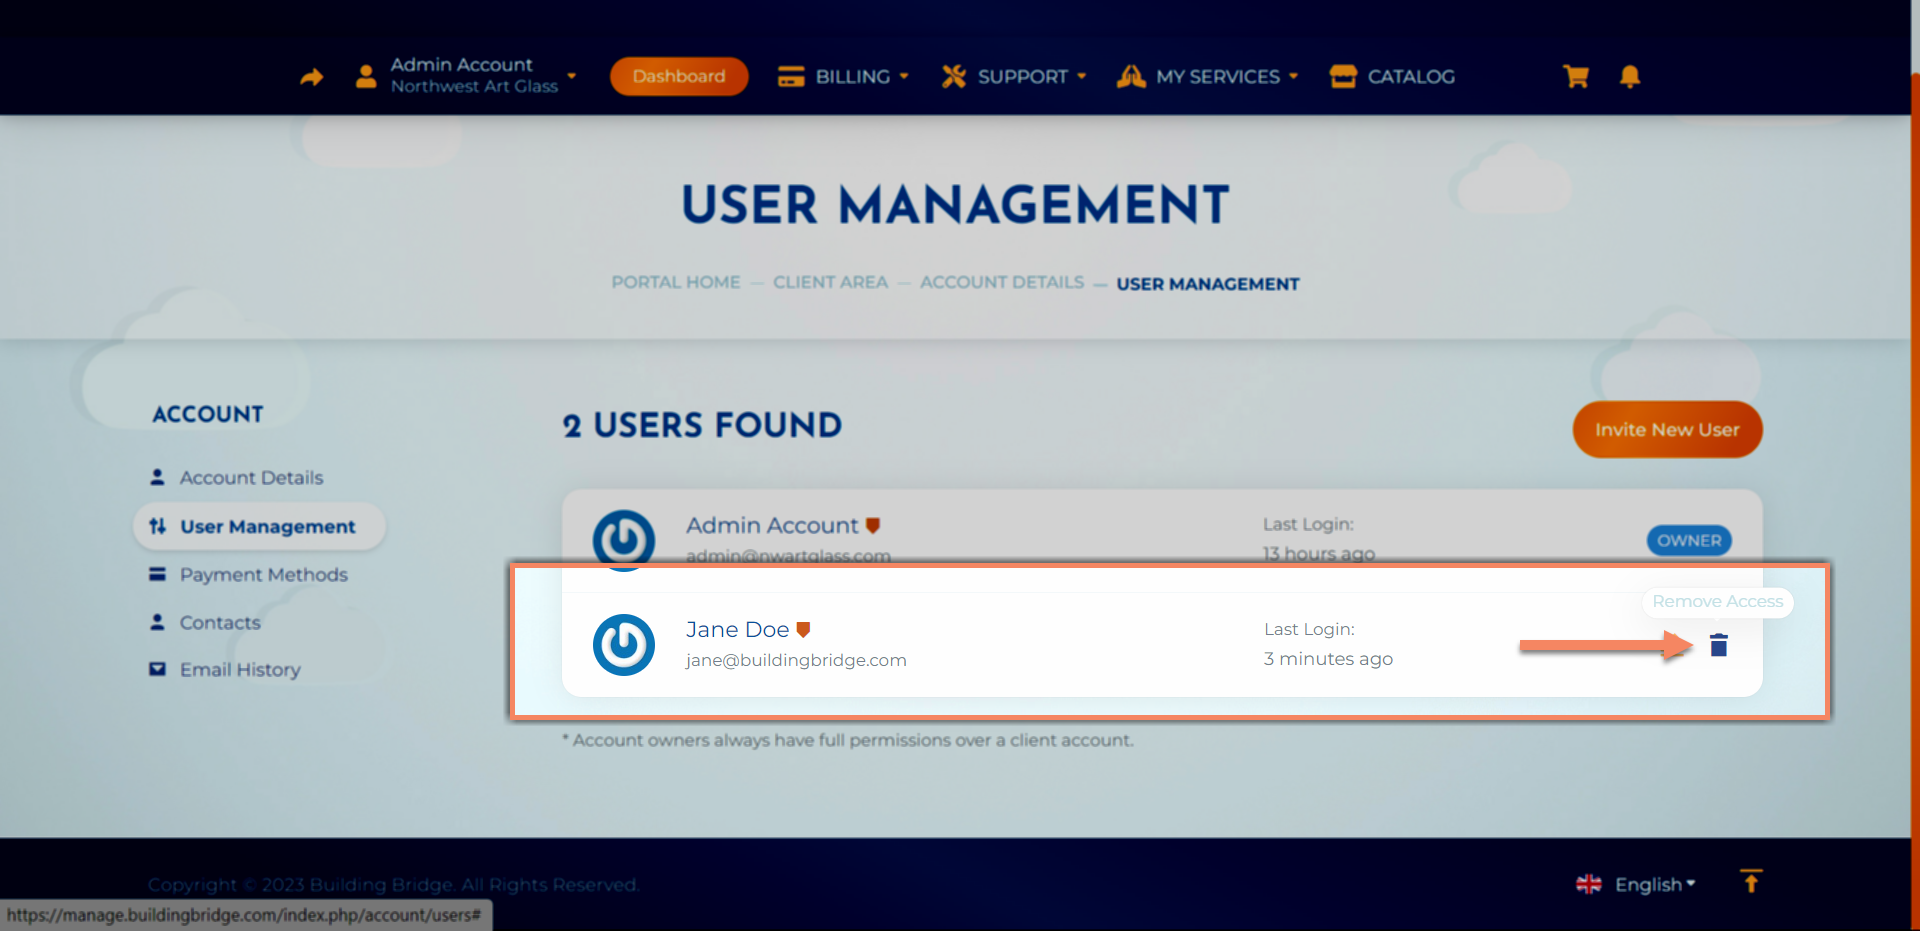
Easily invite or remove users and edit their roles and permissions.
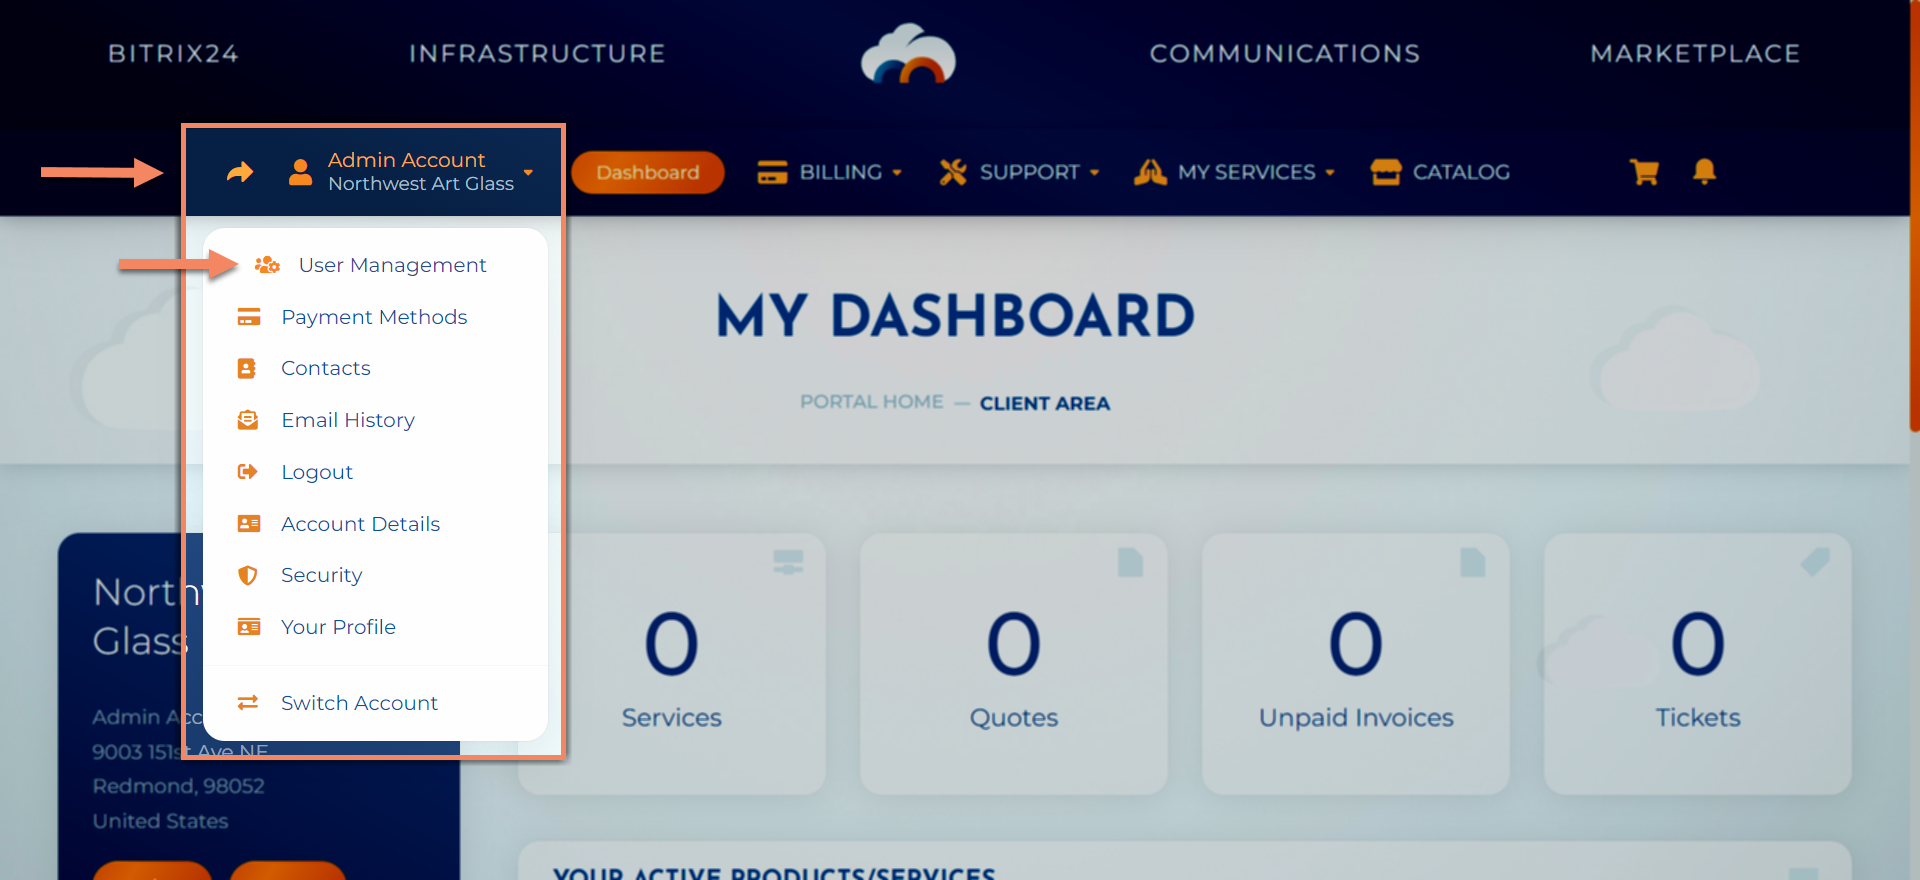
From your dashboard, click the arrow next to your name on your account tab, then click "User Management".
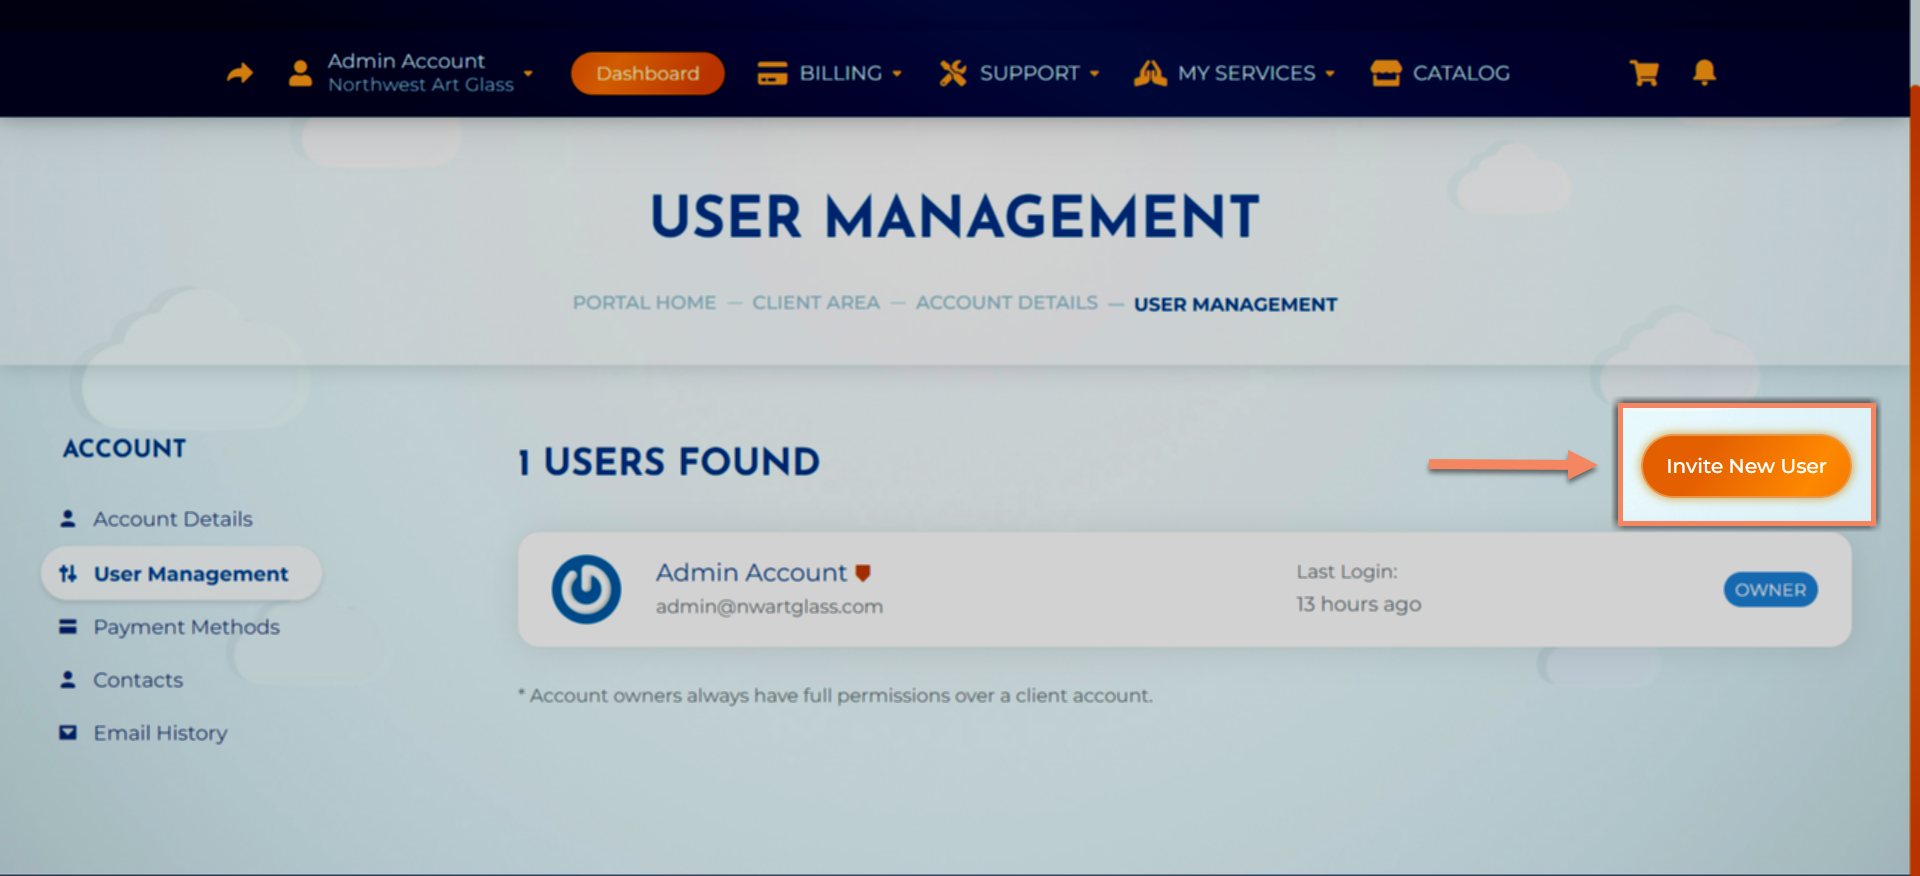
Click the "Invite New User" button.
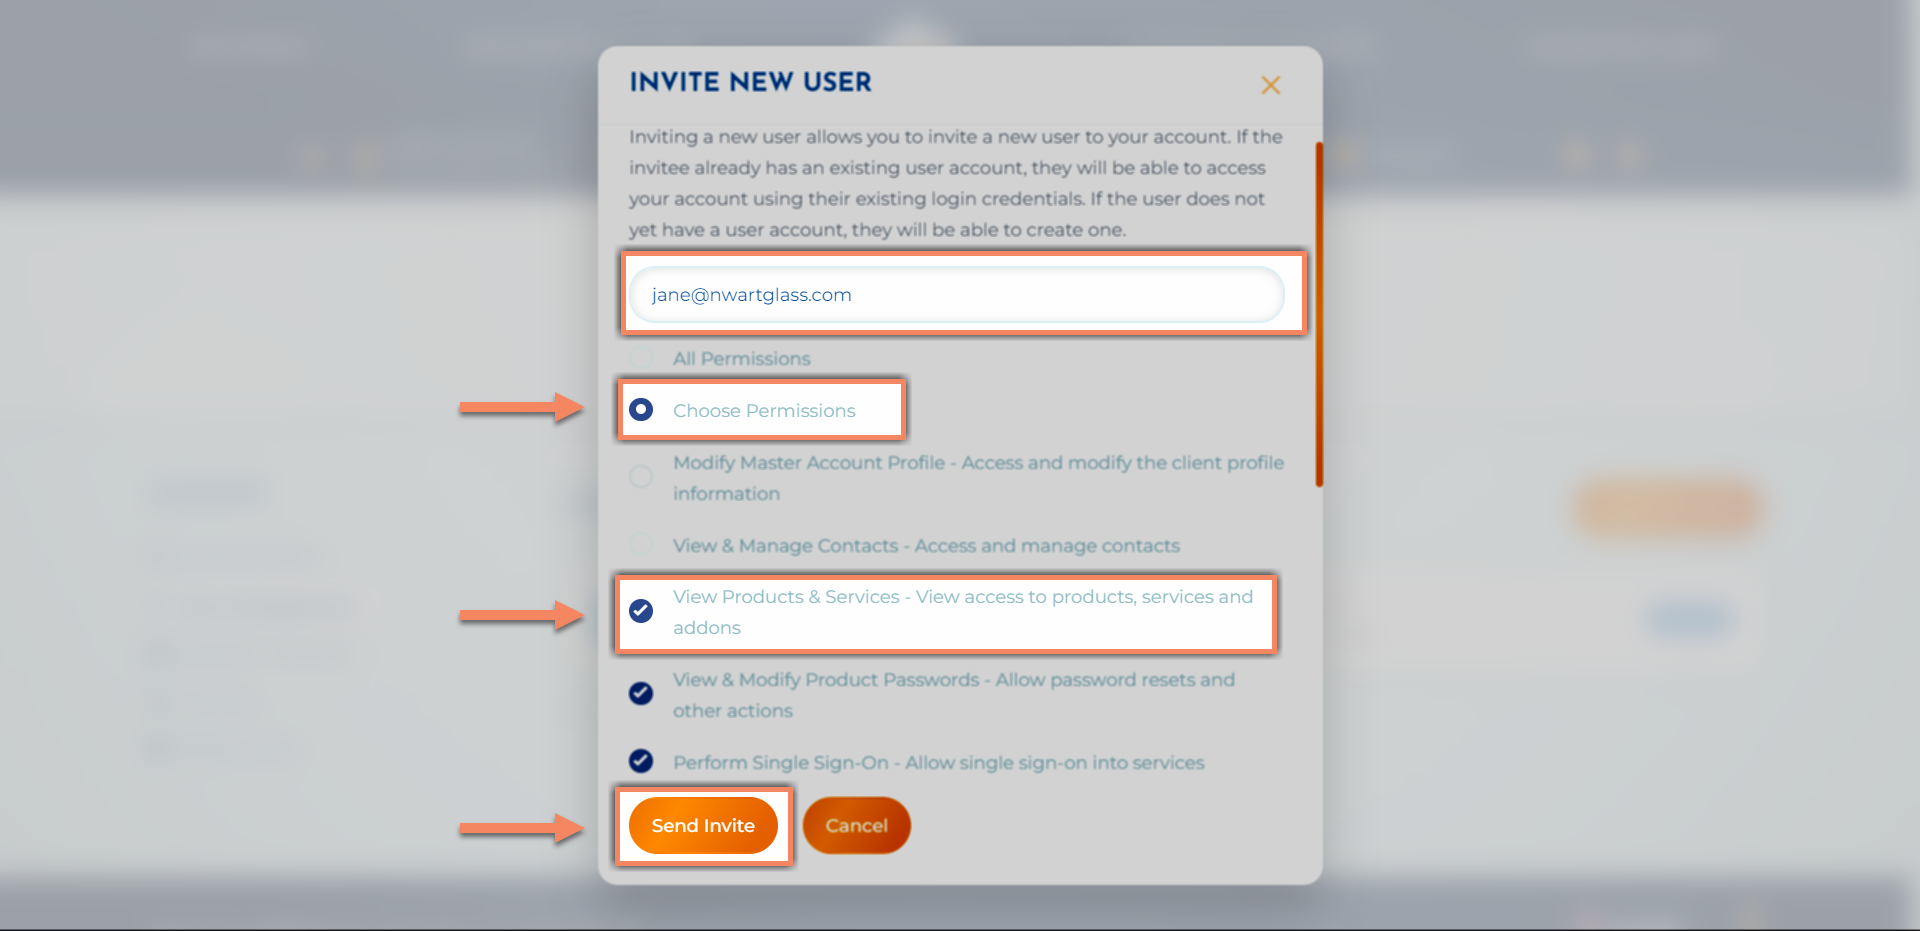
1. Enter the email address of the user that you would like to send and invitation to.
2. Click "Choose Permissions" to select different areas of your account you would like your new user to be able to view or edit.
3. Click "Send Invite".
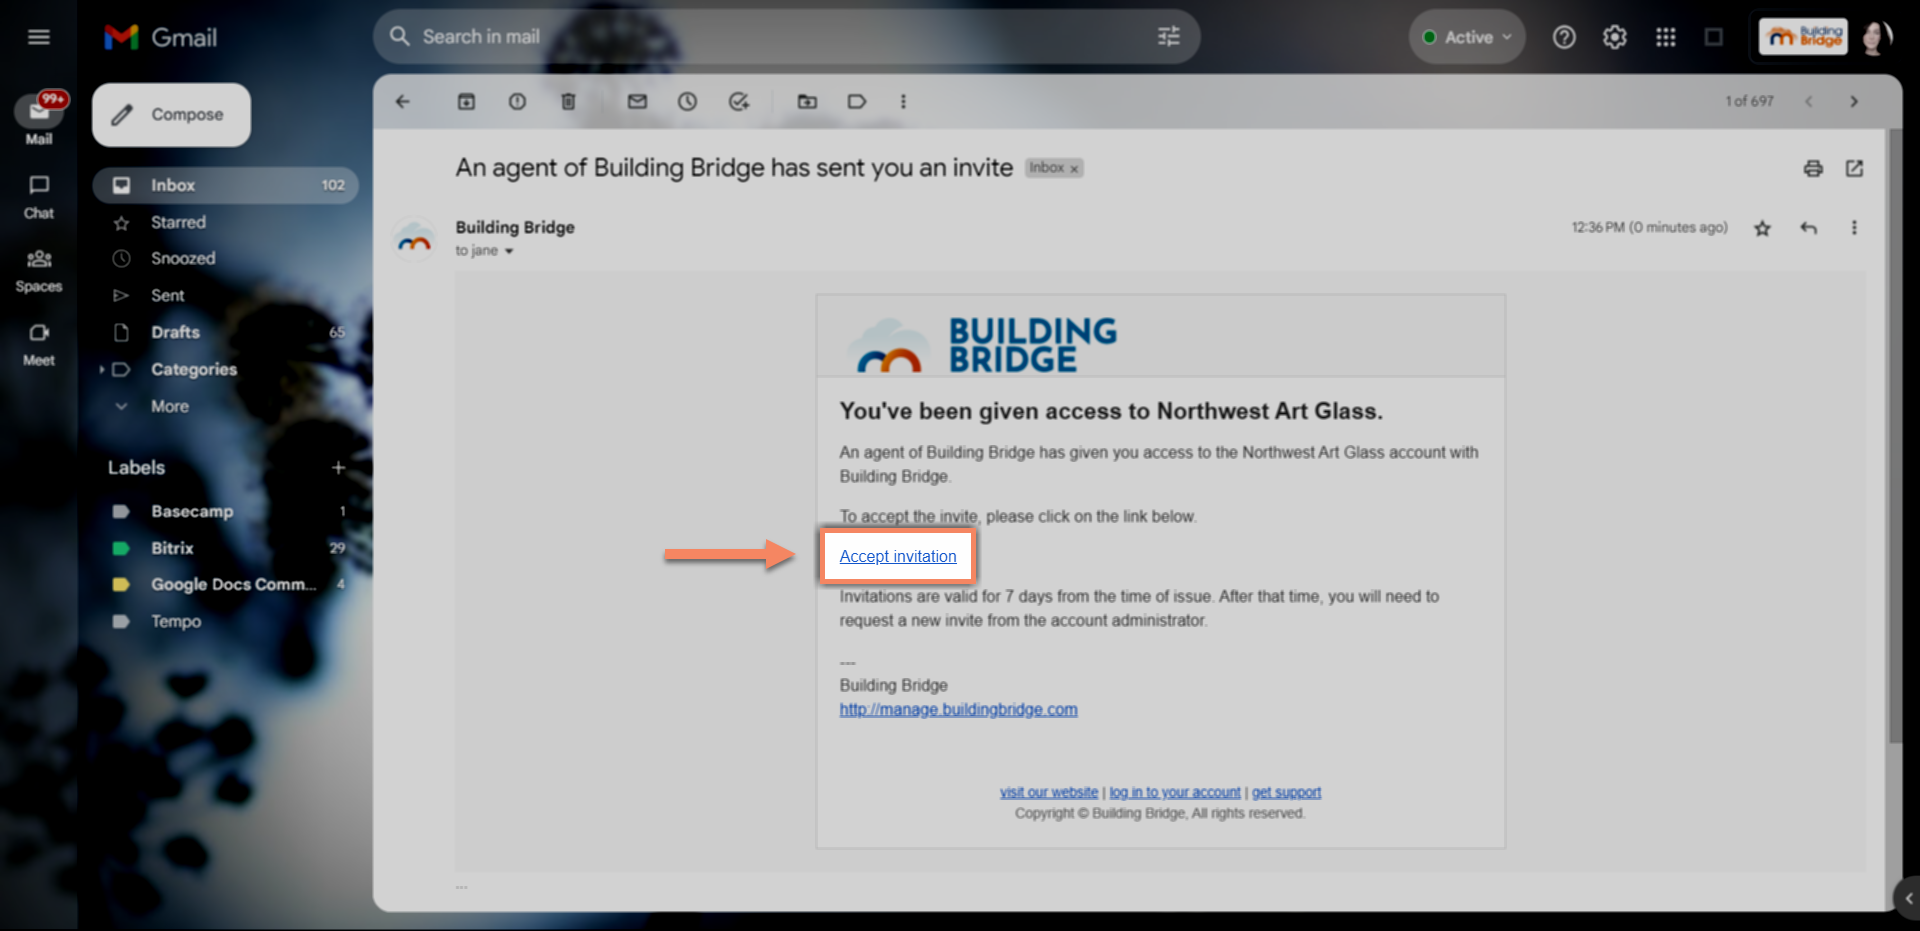
Your new user should receive an email from "support@buildingbridge.com" prompting them to create an account. To create their account they will need to click "Accept Invitation".
If your user has not received an invitation email within a few minutes, advise them to first check their spam folder. If an invite did not arrive, try again by clicking the "Resend Invite" button next to their name in your "Pending Invites" list.
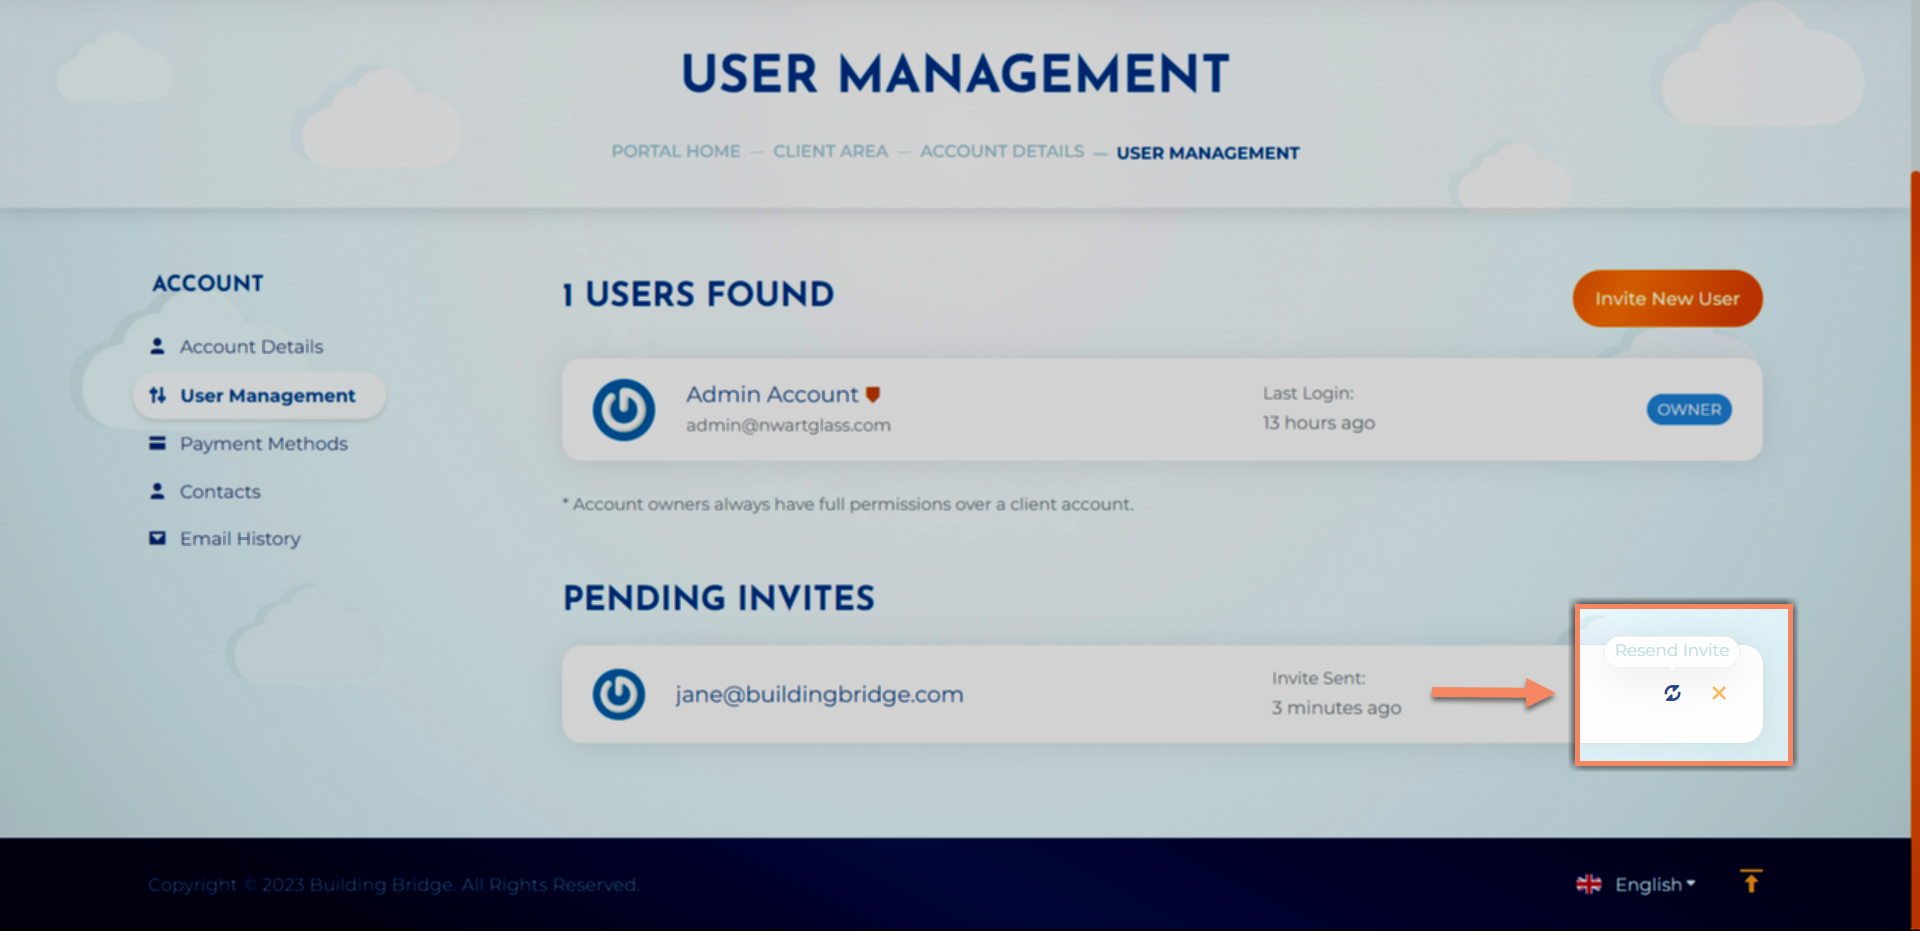
If your user has not received an invitation email within a few minutes, first advise them to check their spam folder. In the event that their email was entered incorrectly you can cancel the invitation and try again by clicking the click the "X" next to their name in your "Pending Invites" list. If their email is correct, send the invitation again by clicking the "Resend Invite" button.
To update permission settings for existing users, click the pencil icon next to their name in your users list.
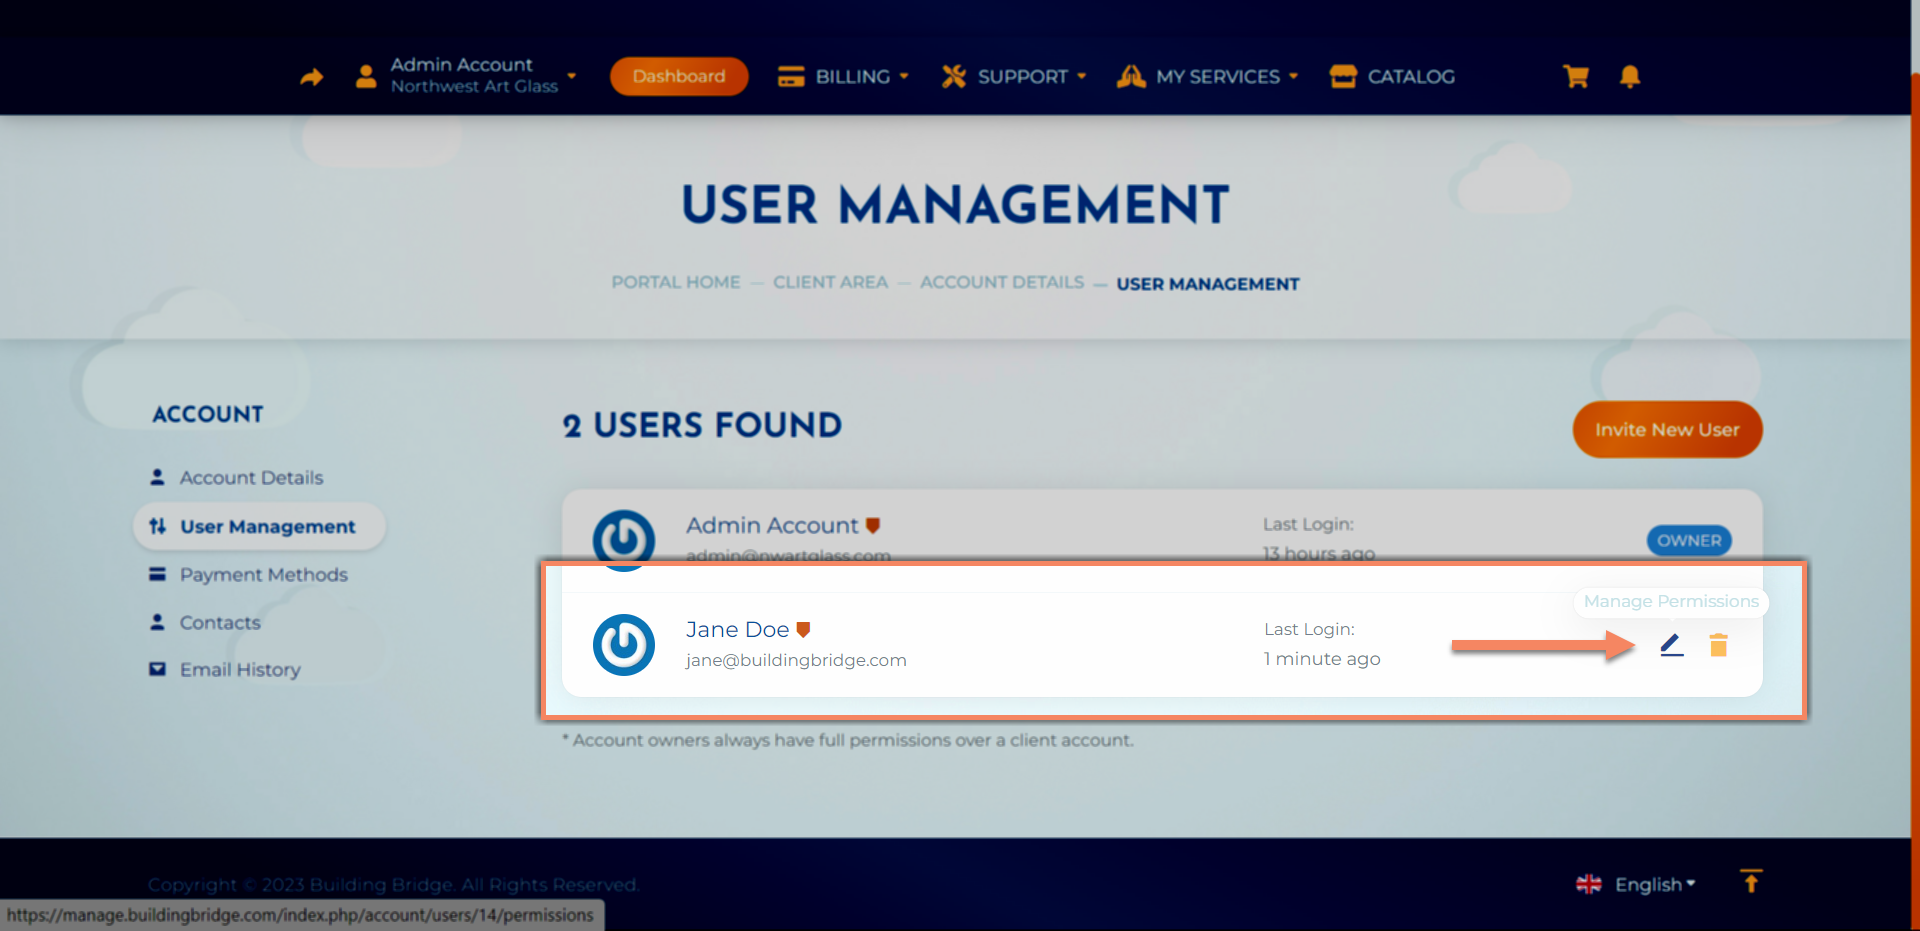
To permanently delete a user, click the trashcan icon next to their name in your users list. This will immediately revoke all access to your company account.